Saturday 30 March 2013

Gruyere & Nettle Tart


I think placing a batch of brioche dough into the fridge, last thing before I go to bed, must somehow trigger an internal alarm so that at 4.30 I automatically wake up to take the dough out of the fridge, divide it up into brioche and return to bed, leaving them to rise until 9.0 when I shall bake them for breakfast.
This morning, while the heat exchange between me and the hot water bottle I was clutching was still just about working in my favour, I noted the time and went back to sleep. The reason for the lie in is last night's batch of brioche dough is to be made into a savoury tart.
My patch of nettles looks rather pathetic; it was covered in snow just a couple of days ago despite this being the very end of March. I was still able to pick enough to flavour this tart. I love the juxtaposition of the lowly but worthwhile nettle and the ultimate decadence of brioche dough, rich with both eggs and butter. Click here for the Brioche recipe


Welcome Jordan, country number 88.


For this tart you will need,
1/2 batch of brioche dough (the rest will freeze really well, or you can use it to make 6 brioche)
Nettle tips, 80g weight after they have been blanched and all the liquid squeezed out.
80g of sliced spring onions
2 fat cloves of garlic finely chopped
130g of grated gruyere cheese
130g of cream cheese
1 egg
1 tablespoon of olive oil
1 teaspoon of chopped lemon thyme
1 teaspoon of marigold Bouillon powder or 1/2 teaspoon of salt
1 teaspoon of coarsely ground black pepper
1/2 teaspoon of freshly grated nutmeg

Begin by blanching the nettles. Having carefully picked the youngest tips of nettles from a reliably clean area, plunge them into a litre of boiling water for 2 minutes. Drain and squeeze the liquid out, and roughly chop. Heat the olive oil in a pan and add the spring onions and garlic, sweat on a low heat for 3 to 4 minutes before adding the nettles, pepper and nutmeg and 50ml of water. Cover and cook until all the mix is dry, this should take no more than 5 minutes, keep an eye on it and stir from time to time. In a bowl mix the grated gruyere with the cream cheese, egg, bouilon powder and lemon thyme, finally add the nettle mixture and stir in to combine. The heat of the nettles will slacken the cheese and egg mixture making it easier to pour onto the brioche dough base, leave to cool.
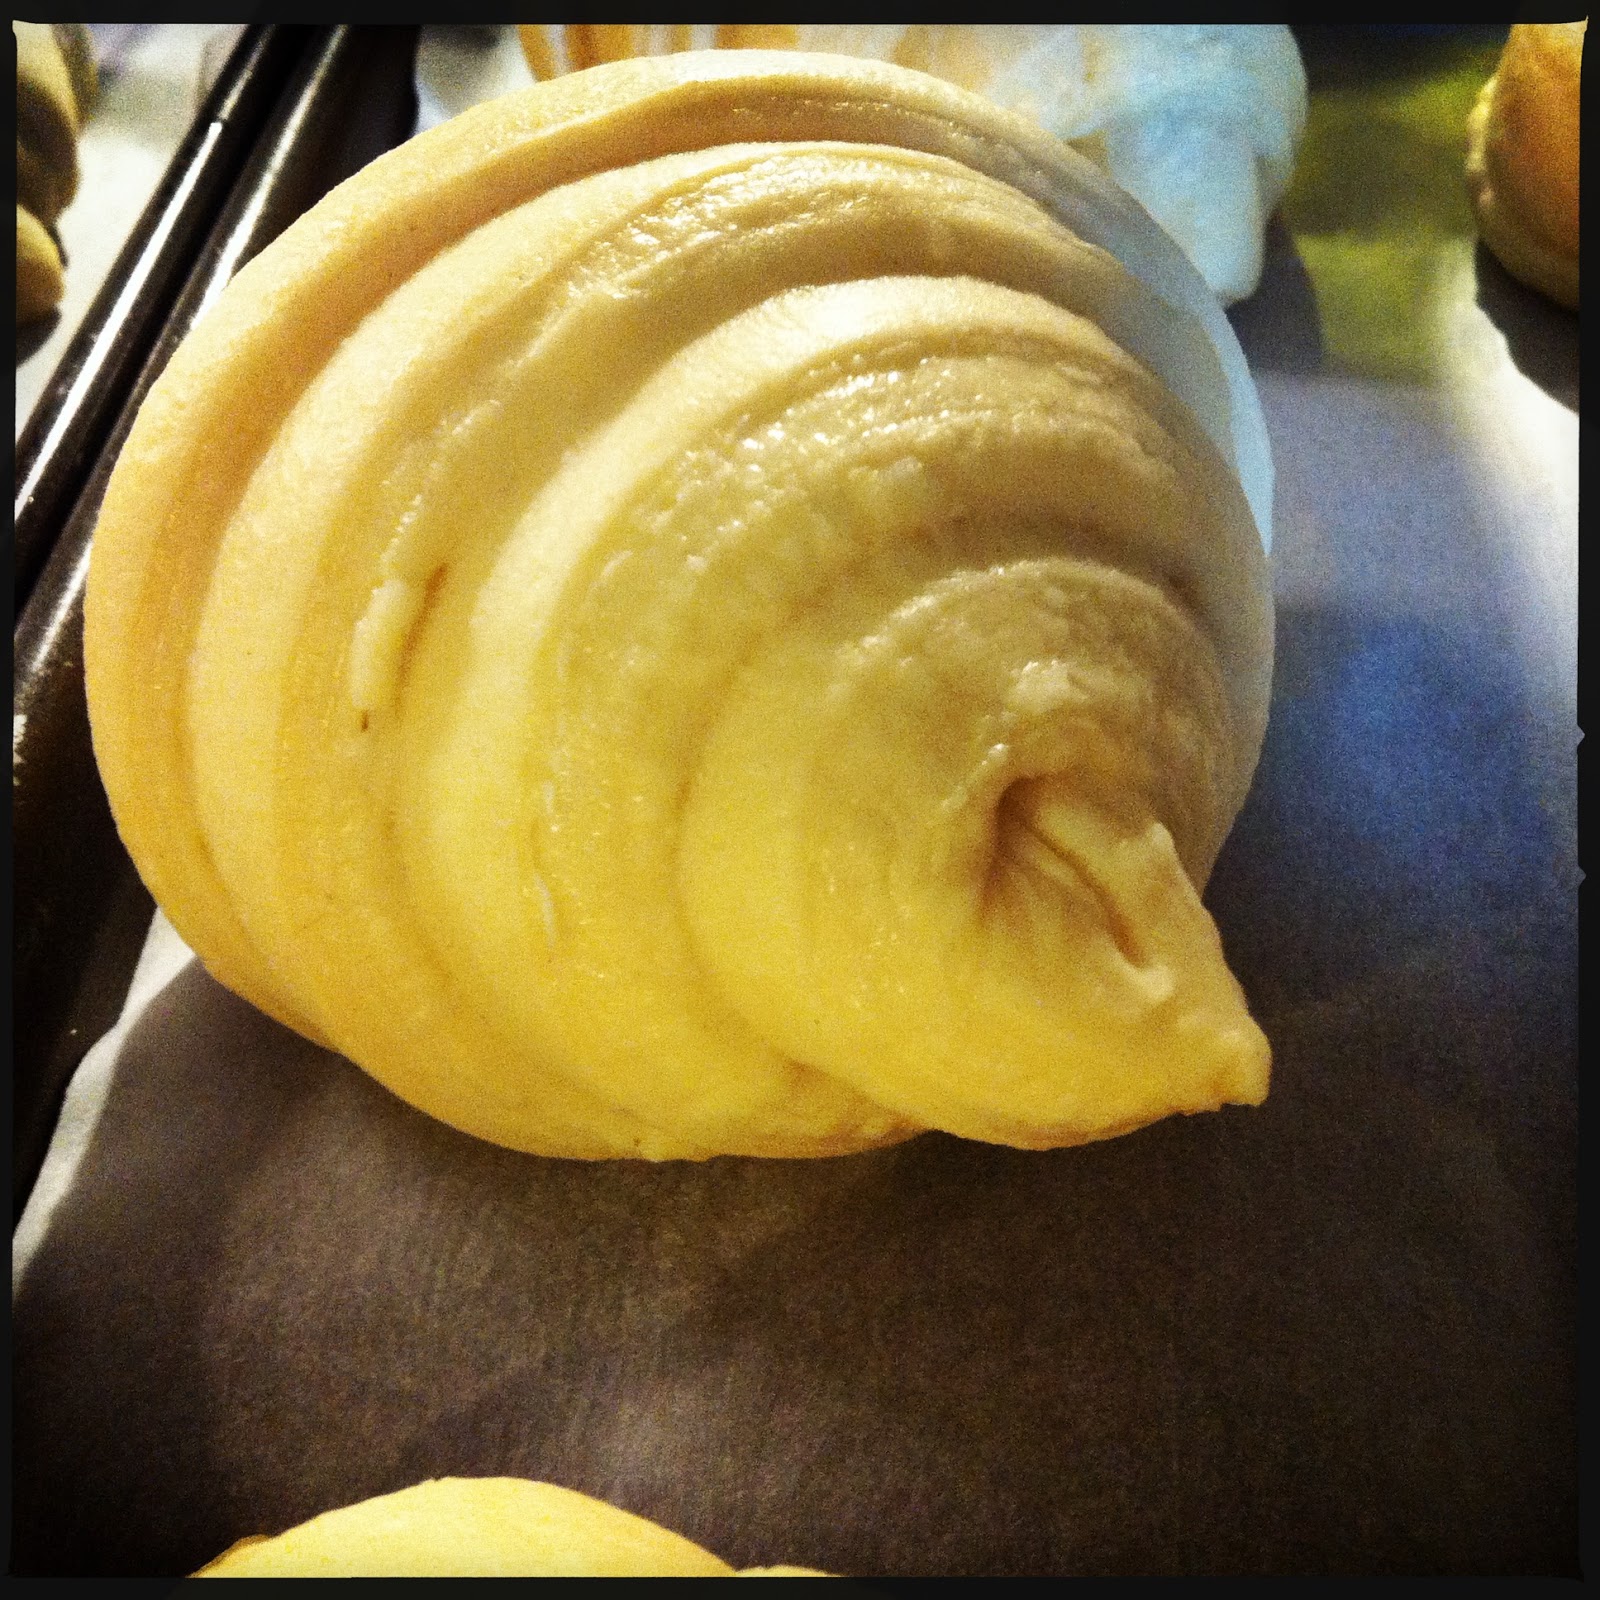
Prepare the tin; I use my tarte tatin dish for this, it measures 28cm by 5cm. lightly butter the tin and dust with flour. Roll out the piece of brioche dough to be 6cm wider than the tin and place the dough into the tin, rolling up the edge to form extra thickness. Press the edge down where the side meets the base and leave for a good 2 hours to fully rise. Heat the oven up to 200C, and just prior to placing the tart in the oven, flatten the base a little by dimpling with you fingers, gently pour the nettle and cheese mix onto the base of the tart and place in the oven for 35 to 40 minutes.The centre should still have a slight wobble when you bring it out of the oven. serve at room temperature.


Notes:
Using brioche dough in this way, in place of pastry produces a tender alternative. 

Friday 29 March 2013

Tomato Soup


I'm the first to admit the flavour of a soup, be it hot or cold, made with fresh tomatoes from the greenhouse in August cannot be beaten, however, it's March, the sun is trying to shine in between rather pathetic attempts to snow and I am trying to make tomato soup using tinned tomatoes.
I find I eat less and less fish; now I cook mainly vegetarian food, but a tiny jar of anchovy fillets in oil remains a very handy thing to have in the pantry, they add a depth as well as some of the salt  in this soup without any fishy taste, but you could omit them if you wish and simply compensate with extra salt. The other addition I make to this soup which I don't with a soup made using fresh tomatoes, is the dried cascabel chilli. The chilli has a medium heat but provides a round nuttiness. Dried savoury is the herb of choice in this soup but dried oregano and a little thyme will substitute very nicely. This recipe produces just over 2 litres of rich warming soup, ideal on a wintry day at the end of March and I am pleased to say, just approved in the last hour by quality control tasters Sue & Dick, I'm really very fortunate.


For this soup you will need,
1 large onion
1 leek
2 sticks of celery
1 large potato roughly 200g
4 fat cloves of garlic
4 anchovy fillets
1 or 2 cascabel chilli
1 tablespoon of tomato puree
1 teaspoon of dried savoury
1 tablespoon of Marigold bouillon powder
100ml pf Noilly Prat
3 teaspoon of sugar
1/2 teaspoon each of black pepper and white pepper
2 x 400g tins of tomatoes
1 tablespoon of olive oil
50g of unsalted butter

Begin by frying the anchovy fillets in the olive oil for a minute or two until they begin to break up. Chop the vegetables and sweat with the chilli in the anchovy flavoured olive oil over a medium heat for 5 to 10 minutes, add the tomato puree and cover with a lid to cook gently for a further 3 or 4 minutes. Add the savoury and the Noilly Prat, Noilly Prat is an ideal pantry ingredient, it provides a hit of white wine when it's required without having to open a bottle. The tiniest amount in a glass with chilled gin is also a really good start to an evening, Place the gin in a glass with 3 cubes of ice and stir for 10 seconds before straining onto the Noilly Prat, I digress. Add the tins of tomatoes and a tin filled with water 3 times. Add the vegetable stock powder, the pepper and the sugar, bring to the boil, and turn down the heat. Cover and simmer for an hour. Blend with 50g of unsalted butter to produce a rich, velvety soup that doesn't have the overly dairy flavour that adding cream would produce.

Notes:
My cheese croutons are just right with this soup, Click here for the recipe

Caramel Chocolate Mousse


It's Easter and apart from the baking of hot cross buns and simnel cake, the other edible treat we associate with this Christian festival is chocolate of course. The idea for this mousse began a few days ago when I was trying to work out in my head whether or not it would work. This morning the thought of being able to have something chocolatey to enjoy forced the issue and I made it. I have to say, the next time I make it I will be far more careful about how to add the melted chocolate so what follows is an improvement on what I actually did.

To make this mousse, enough for 6 to 8, you will need,
200g of dark chocolate, 70% cocoa solids is what I use but then I like dark and intense chocolate.
3 medium eggs
190g of sugar
200ml of double cream
1/2 teaspoon of salt

Place 3 eggs in the bowl of a mixer along with 50g of sugar and the salt. Whisk until you have a light foam. Begin making the caramel; dissolve the remaining 140g of sugar in 100ml of water and slowly bring up to a boil. Keep cooking with a watchful eye, until the sugar begins to turn colour. At first a straw colour but then very rapidly a deeper brown. Turn the heat off and immediately add a further 50ml of water. There will be a great deal of spitting and bubbling up so do be careful to avoid getting any on your arms. Go back to the mixer and with the machine on full speed, gradually pour the caramel down the side of the bowl while the eggs are beating and creating more volume and taking on a slightly caramel colour. At this point I poured in the melted chocolate while the mixer was still beating and lost quite a lot of the volume, so instead I suggest;  Melt the chocolate in a microwave in 1 minute lots until it is fully melted, gradually and carefully fold the melted chocolate into the caramel egg mixture, being careful to avoid losing too much air. Finally whip the cream to a soft peak and fold in. You can at this stage fold in a little brandy or cointreau if you like. Pour into glasses and chill before serving. The job of dealing with the remains in the bowl is a bit of a trial but someone has to do it.


Notes:
This cooked form of beaten eggs is in fact a form of sabayon and if the sugar syrup is taken up to only 150C rather than up to the caramel stage it can be used to make other mousses.
My tasting panel, (Sue & Dick) failed to finish theirs claiming it was a bit rich, so be warned. It's just possible this recipe would be best served in smaller containers for 8 to 12 people, as an intense chocolate hit.

Wednesday 27 March 2013

Hot Cross Buns


Here we are with the second of the Easter baking treats. My chickens have gone berserk and are laying between the eight of them, seven eggs a day. I give away what I can to friends but I am struggling to keep up so this year I'm including an egg in whatever recipe I can, hence hot cross buns enriched with an egg, why not. The difference between these intensely scented, light buns and the things that are sold in supermarkets, is huge. As with all things, if you are going to the effort of making things to eat and share, generosity is key, leave cost cutting to the commercial sector. These will taste wonderful even if you use bought candied peel, but the extra burst of orange you get from using candied orange peel that you make, is well worth the effort, click here for the recipe.

And Slovenia, country number 87!


For this recipe you will need,
500g of strong white flour
50g of light muscovado sugar
10g of fast action yeast
100g of softened unsalted butter
1 egg
150ml of milk
150ml of water
10g of salt
2 teaspoons of mixed spice
1/2 teaspoon of freshly grated nutmeg
200g of mixed dried fruit, I use golden sultanas, green raisins and brown raisins.
80g of candied orange peel.
100ml of tea for soaking the fruit. 

For the cross
200g of plain flour and just enough water to make a paste.
a little sugar syrup to glaze (equal parts sugar and water dissolved and brought up to a boil before cooling)

Begin by soaking the fruit, a tip here is to place the fruit and the tea in the microwave for 3 minutes to give the soaking process a boost. Add the spice and leave to soak for up to 24 hours.
Make the dough by mixing together the flour, yeast, sugar, egg, salt, milk and water to form a soft dough. with the mixer on a high speed gradually beat in the softened butter until it has been completely incorporated. Leave to rise for a couple of hours. Add the soaked fruit and mix only until the fruit is evenly distributed, roughly a minute on a medium speed. Leave the dough to rise for a couple of hours, the time will vary according to how warm your kitchen is. Divide the dough into 12 to 16 balls and leave to rise until well risen.  The buns should be at least double in size before baking. The last thing to do before placing in a hot oven 200C for 15 to 18 minutes is to pipe the cross on the top. Brush the baked buns with a little sugar syrup to glaze.

 Notes:
I keep the sugar syrup that I poach pears in, which has been flavoured with cinnamon and star anise, just for this sort of purpose, glazing a spicy bun or cake that has just come out of the oven but a simple sugar syrup will also work.
I found weighing each bun to be roughly 100g when shaping, I ended up with 14 hot cross buns.

Tuesday 26 March 2013

Simnel Cake


It's that time of year when a simnel cake is expected when folk drop in for a cup of coffee. Simnel cake historically was eaten on the middle Sunday of Lent, acting as encouragement to keep going I imagine. It then became linked to Mothering Sunday but more recently we in the UK consider it one of the Easter treats. The two layers of marzipan, one in the actual centre of the cake, the other on top, are what distinguish this cake from my regular light fruit cake. This is where commercial marzipan simply doesn't work, due the high sugar content of commercial marzipan, it behaves quite differently when cooked, so if you would like to make this recipe do read the post "2 tips for Christmas baking" where you will find the recipe for home made marzipan click here for the recipe.

Hooray for Leichtenstein, country number 86 on the list of followers!


For this cake you will need,
200g of plain flour
60g of SR flour
250g of unsalted butter at room temperature
250g of light muscovado sugar
4 medium eggs
200g of golden sultanas
200g of raisins
150g of glacé cherries
80g of candied peel
1 teaspoon of mixed spice
Zest of 1 lemon
100ml of sweet sherry
1/2 teaspoon of salt
700g of marzipan
A little beaten egg for glazing
A little apricot jam

Begin by soaking the dried fruit and candied peel overnight in the sweet sherry, you can speed up this process by  placing the fruit and sherry in a microwave for 3 minutes. The fruit will soften and plump up a little, then continue to soak for an hour or two. Prepare a tin (18cm by 9cm) by lining with baking parchment. Switch on the oven to 140C Make the cake by creaming together the butter and sugar. Add the eggs one at a time then fold in the sifted flours, mixed spice and salt. Finally add the soaked fruit and candied peel and the lemon zest. Roll out 300g of the marzipan to form a disc which will fit perfectly inside the baking tin and another 300g similar disc which will fit perfectly on top of the finished cake. Roll the remaining 100g of marzipan into 11 equal size balls. Place half the cake mixture in the bottom of the cake tin, smooth out the surface before placing on one of the discs of marzipan. Place the remaining mixture on top of this disc, sandwiching it between two portions of cake mixture. Place in a moderate to low oven 140C for 2 hour 30 minutes or until a skewer comes out cleanly when pushed into the middle of the cake. The layer of marzipan will inhibit the baking of this cake so test to see if the cake is fully baked and if it shows signs of needing more time, cover with kitchen foil, turn the temperature down a little and give a further ten minutes or so. This cake is unlikely to have a dry texture so do take the time to fully bake. Remove the cake from the oven and allow to cool. Brush the top of the cake with a little apricot jam to act as glue for the top disc of marzipan, brush sparingly with the beaten egg, place the eleven small balls of marzipan around the edge, brush these too with the beaten egg and place in a hot oven 200C for 4 minutes. This cake can be made up to a week before Easter and will delight lovers of proper marzipan.

You will not only have enough marzipan for this recipe if you make a double quantity of the recipe above but you'll also have enough left over to bake some almond biscuits click here for the recipe, just omit the candied lemon peel, bonus!

Monday 25 March 2013

Chelsea Buns


It was back in the 1980s when I began visiting friends in Cambridge that I was treated to Chelsea buns from Fitzbillie's. The then family owned business was famous for it's cakes and in particular the Chelsea buns. These days the business has changed hands at least once and despite the claim that the old family recipes where sold on with the business, the buns don't taste quite as delicious as I remember them. My lasting memory is that they were mahogany brown, rich with fruit and as sticky as you could just about manage.
My version of Chelsea buns are I hope delicious but I could never claim they're as good as the Fitzbille's buns, they are certainly tender, light, moist and the flavour reminds me of the treacle toffee my grandmother made every winter, convinced that it would help us children avoid colds, it didn't.

For this recipe you will need,
500g of strong white flour
175g of unsalted butter
40g of caster sugar
50g of light muscovado sugar
10g of fast action yeast
3 eggs
125g of milk
80g of water
10g of salt
200g of golden raisins
200g of Lexia raisins
80g of candied orange peel
3 tablespoons of DiSaronno amaretto liquer
4 tablespoons of date syrup
1 teaspoon of mixed spice.

Begin by making the dough. Combine the flour, eggs, milk, water, yeast. salt and sugar to form a soft dough. With the mixer on high speed, beat in 125g of softened butter and set the dough aside for a couple of hours to rise. Knock the dough back and place covered in the fridge to firm up for at least 4 hours. This rest allows the flavour to develop and also helps the dough to firm up making it easier to handle.
Meanwhile combine the fruit, candied peel, (I use my own recipe for candied peel click here for the recipe I store the peel in a jar topped up with DiSaronno, it keeps the peel soft and imparts a wonderful almond flavour) 2 tablespoons of the date syrup, the amaretto liquer and the mixed spice. I heat up the mixture in my microwave for 2 minutes just to plump up the fruit and get the whole soaking process underway. Leave to cool while the dough is resting.
Prepare a 20 x 30 x 5 centimeter tin by lining with baking parchment. Melt the remaining butter and brush almost all of it onto the bottom, keeping a little back for brushing on the outside of the rolled up dough. Sprinkle on the muscovado sugar.
Take the dough out of the fridge and roll it out into a rectangle measuring 30cm by 50cm and distribute the soaked sticky fruit over the surface then roll up along the long edge. Having rolled the dough up I find I need to even the roll out a little and by the time this has been accomplished it's also grown in length a bit to around 65cm. Brush the outside with a little melted butter, this allows each bun to pull apart easily when baked. Cut the roll up into 12 pieces and place cut side down on the base of the tin which has been spread with the melted butter and sugar. Leaving a little room for them expand sideways, leave to rise until at least doubled in size. Bake in a moderately hot oven, 200C for 25 to 30 minutes, reduce the heat if you think they are browning a little too quickly. When the buns are baked and are taken out of the oven, brush with the remaining 2 tablespoons of date syrup to glaze.


Notes:
When it comes to spreading the fruit that has been soaking up all the syrup onto the dough, I find nothing works better than using my fingers, it's sticky but it works.

Sunday 24 March 2013

This is not Hovis

Hovis is certainly part of  UK bread history; for me I came across it in the 1950s. A distinctive tin loaf with the word Hovis in low relief on the side, it tasted different to any other brown bread that you could find. It was only in the 1970s, when I began baking my own bread more earnestly that I discovered the distinctive flavour of Hovis comes from the use of wheatgerm.
This bread is a not Hovis, which I imagine is still made from a secret recipe, but the addition of wheatgerm and molasses makes a very delicious loaf and baking the loaves in tins despite the absence of the word Hovis on the side makes a loaf which is great for sandwiches.

For this recipe you will need:

For the ferment,
100g of starter from the fridge
150g of strong white flour
50g of rye flour
200g of water.

For the main dough,
All of the ferment
500g of strong white flour
500g of strong wholewheat flour
100g of wheatgerm
1 tablespoon of molasses
600g of water
22g of salt

Begin by making up the ferment. Mix all the ferment ingredients and set aside for 24 hours in a 2 pint pudding basin. It's march and my house in East Anglia is still cold so it takes at least 24 hours for the ferment to show vigorous signs of growth. It may take less time where you live depending on the ambient temperature, just keep an eye on things and only add the ferment to the remaining main dough ingredients when it is producing lots of bubbles which break and reform quickly.
Mix up the remaining main dough ingredients, apart from the salt and continue to mix to develop the gluten for 2 to 3 minutes (I do this in my Kenwood mixer) The gluten is going to develop over the next 8 hours or so without any extra effort from you, but I find a little extra in the beginning, helps. Leave the dough to rise slowly for 8 hours, again depending on the ambient temperature. Add the salt and mix in thoroughly. Transfer the dough to a stout polythene bowl or box and leave for 3 to 4 hours, stretching and folding the dough each hour. You should find the dough tightening up a little more and becoming more inflated with each hour. I take care to de-gas as little as possible, losing a little of the air that has been created is inevitable but it's not a problem. Divide the dough and shape into loaves, with this quantity I made 3 loaves, 2 in tins, the 3rd in a cane banetton. Leave the dough for 2 to 3 hours before baking in a hot 220C oven for 30 to 35 minutes.
Perfect Soldiers


Flowers from Jan

Notes:
I make the dough for this type of bread a little firmer, using less water so that it produces a more even crumb which I think suits tin loaves.
The addition of the wheatgerm and a small amount of molasses gives this bread an exceptional flavour.

Wednesday 20 March 2013

Gruyere Cheese Twists


Basic croissant dough can be used to make Danish pastries but another and perhaps for me preferred use of the dough is in making something savoury, cheese twists made with gruyere cheese and mustard are a perfect if dangerous (it can be difficult to stop eating them)thing to make. I find cutting a slit in the oblong of rolled out dough and folding the dough in on itself, creates the perfect twist and avoids the finished article untwisting during the baking process.

For this recipe you will need.
1 quantity of basic croissant dough Click here for the recipe
200g of gruyere cheese, grated
1 tablespoon of wholegrain mustard
1 tablespoon of double cream or creme fraiche
1 teaspoon of marigold bouillon powder or 1/2 teaspoon of salt
1/2 teaspoon of black pepper

Begin by making the croissant dough, at the point where the dough has been folded and rolled out three times, roll out a final time to a rectangle  20mm by 40mm  Mix together the mustard, cream or creme fraiche and seasoning, spread the bottom half with this mix and sprinkle on the grated cheese. Fold the top half of the dough back over the bottom half to completely cover and gently roll out to a rectangle of 20mm by roughly 75mm, pressing gently to create a good bond. Cut this new rectangle up into 25 pieces and cut a slice in the middle of each piece in order to twist through both ends. I find 3 twists is sufficient and manageable. Leave to rise either in a cool place overnight as I do or in a warm place until doubled in size, around 2 hours. bake in a hot oven 200C for 12 to 15 minutes or until golden brown and crisp.

Notes:
This basic recipe can be altered by using different cheeses, using pesto in place of the cream and mustard mix, you can even consider making sweet versions using a mixture of creme fraiche, sugar and cinnamon. If you're making sweet versions keep an eye on the timing, sweet things burn at high temperatures very quickly. 
I trim off the edges of the rectangle before I begin dividing up the dough into 25 pieces, these trimmings can be twisted into little shapes and cooked along with the twists, cook's perk!

Tuesday 19 March 2013

Freekeh with Cabbage


I shouldn't really be using my new rondeau before my birthday in a couple of weeks, but having had it re-tinned it is a bit irresistible. I should say tinned since it began life un-tinned as a 19th century preserving pan which I decided would serve me better as a rondeau that I could use for cooking things other than preserves.
Hedd and Leo had bought a cabbage on a walk in the village so I decided to create a dish that included it and some freekeh, a roasted wheat product from Lebanon which most resembles bulgur. If you can't find freekeh you can substitute bulgur but it won't have quite the same flavour. The freekeh grains should still have a slight bite to them when they are cooked.

Freekeh grains

For this recipe (serves 4) you will need,
2 medium onions, chopped
3 sticks of celery, chopped
Half a cabbage shredded, roughly 500g
4 cloves of garlic, chopped
150g of freekeh or bulgur
1 rounded teaspoon of cumin seeds
2 tablespoons of olive oil
1 tablespoon of tomato puree
75g of cheddar, grated
I litre of vegetable stock
1 teaspoon of coarsely ground black pepper
1/2 teaspoon of cayene pepper

Begin by sweating the onion, garlic and celery in the olive oil for 3 or 4 minutes until they become translucent. add the cabbage and continue to cook for a further 3 minutes before adding the tomato purée, cook for a couple of minutes. Tomato purée always requires a little cooking before adding liquid for best results. Add 500ml of the vegetable stock and seaoning and continue to cook on a gentle heat until nearly all the liquid has been reduced. Taste the reduced liquid at this point and adjust the seasoning if necessary. Add the freekeh and the remaining stock, stir well in to distribute with the braised vegetables and cover the surface with the grated cheese. Place the pan in a moderate oven 180C for 20 to 40 minutes, The finished dish should be dry without  liquid but the not dried out. The vegetables and freekeh should be moist, tender and full of flavour. This can be served hot or at room temperature.


Notes:
It's possible to introduce any number of vegetables into this basic dish, but I find it best to restrict it to one or two so that you can create the cabbage version, the peppers version, the green beans version for instance. That way the different versions that you serve up are more distinct.
The addition of cheese gives this dish a protein component making it more of a meal on its own, but it's easy enough to omit the cheese and serve the dish in the same way as you would serve a pillaf.
Again this is a dish which will lend itself to alteration based on what you have at hand, just remember the flavour of the stock will determine how full flavoured the finished dish is.

Monday 18 March 2013

Aubergine & Halloumi in a Tomato & Pepper sauce

This is a lovely supper dish, served hot from the oven with new potatoes. but for me it's a dish that is best served at room temperature, as part of a selection of tapas or mezze. This quantity serves 6 as a main course or 10 as a starter.

For this recipe you will need,
3 medium sized aubergine
2 packs of halloumi cheese
1 tin of chopped tomatoes
1 large onion
2 sticks of celery
2 red peppers
4 cloves of garlic, more or less
1 tablespoon of tomato purée
1 teaspoon of salt
1 teaspoon of black pepper
1 teaspoon of sugar.
1 teaspoon of dried oregano
olive oil

Begin by slicing up the aubergine 1 centimeter thick and wiping with a little olive oil before cooking either in a heavy based pan or flat griddle. The aubergine need to be cooked right through and take on a golden brown colour. Put to one side while you slice up the halloumi cheese and fry in a little olive oil until they too have taken on some colour. make the sauce by chopping up the garlic, onion and celery and frying gently in two tablespoons of olive oil until they have become translucent, around 5 minutes. Add the chopped up de-seeded red pepper, and continue to cook until the pepper is tender, around 5 to 10 minutes. Add the tomato purée and cook for another 2 minutes before adding the tin of tomatoes, 500ml of water,  salt, black pepper, sugar and the oregano. Cook gently covered for at least 30 minutes.
In the bottom of a lasagne dish place a thin layer using half the sauce, then wrap each piece of the halloumi in a slice of cooked aubergine and place in the dish to fill a complete layer before placing the remaining sauce over the top. bake in a moderate oven 180C for 40 minutes.


Notes:
If I have a few small pieces of either the aubergine or the cheese left over, I distribute them evenly in the dish before placing on the remaining sauce.
Left overnight in the fridge, the flavours in this dish deepen and intensify, but do allow time for it to come back up to room temperature before serving.

Saturday 16 March 2013

24 hour Croissant


 You might think making your own croissant is a step too far, but let me try to change your mind. Croissants made at home are considerably more delicious, they have a totally different texture to the ones that come packaged up where the effects of the package and the length of time the croissant have been in the package both render them soft and lifeless. Croissant freshly baked have layers and layers of tender, light buttery dough and a crust that shatters as you break into it. The plate should be strewn with splinters of the thinnest crust as you eat them. The second reason I would encourage anyone to try making croissant, is, they are easy enough. They do as the name suggests take time, but it's time that you can get on with your life while the yeast on the dough works its magic, creating flavour and ultimately a light as air flaky result. The third reason is, they are considerably cheaper to make than to buy.
I am taking advantage these days of the cold conditions and this batch of croissant took exactly 24 hours. I began the dough one day at 9.00, placed it in the fridge and after shaping the croissant at around 11.0 at night I left them covered in my cold kitchen overnight, baking them at 9.00 in the morning. The flavour is outstanding.


Click here for the recipe


Notes:
I have employed some of my wild yeast in the making of croissant in the past, it does add to the flavour of course, but really it isn't necessary if the croissant have as much time to develop flavour as these; the main difference will be the texture of the crust, which instead of splintering easily takes on a slightly tougher texture.