Monday 24 October 2016

Butternut Squash and Sun dried Tomato Soup


These days butternut squash soup is often to be seen on a pub menu; I have to admit to it always being a little off putting. The problem is butternut squash lends itself perfectly to being made into soup and as such, it's often a lazy option. Boil a butternut squash in some stock, blend it and you have a reasonable if mediocre soup.
Think about enhancing the natural sweetness of the vegetable and become a little creative and you will be rewarded with a far better and worthwhile soup.
This soup incorporates sun dried tomatoes, and that hugely important spice cumin, its earthy savoury quality is perfectly matched with the sweet squash. The addition of a little chili completes the mix.
The texture of the dense flesh once cooked and blended is so creamy, this recipe requires only the oil that remains clinging to the sun dried tomatoes and no more, so comes in as a low calorie dish.

For this recipe you will need;
500g of butternut squash
300g of chopped onion
3 fat cloves of garlic chopped
75g of sun dried tomatoes
1 litre of vegetable stock
1/2 teaspoon of ground black pepper
1/2 teaspoon of cayenne pepper

Begin by gently cooking the onion, garlic and sun dried tomatoes, roughly chopped in a large enough saucepan. The oil from the tomatoes will be sufficient to moisten the onions and garlic, you won't need any more.
Cut up the squash into chunks, since the final soup is to be sieved, there is no need to peel it. cook on a low heat until the onion becomes translucent, about 3 or 4 minutes.
Add the stock and seasoning and simmer gently, with the lid on, for an hour.
Using a blender, I find the stick variety far easier and safer with hot liquid these days, blend until you have a smooth soup. Sieve and reheat before serving.


I made my own dried tomatoes in oil this year for the first time

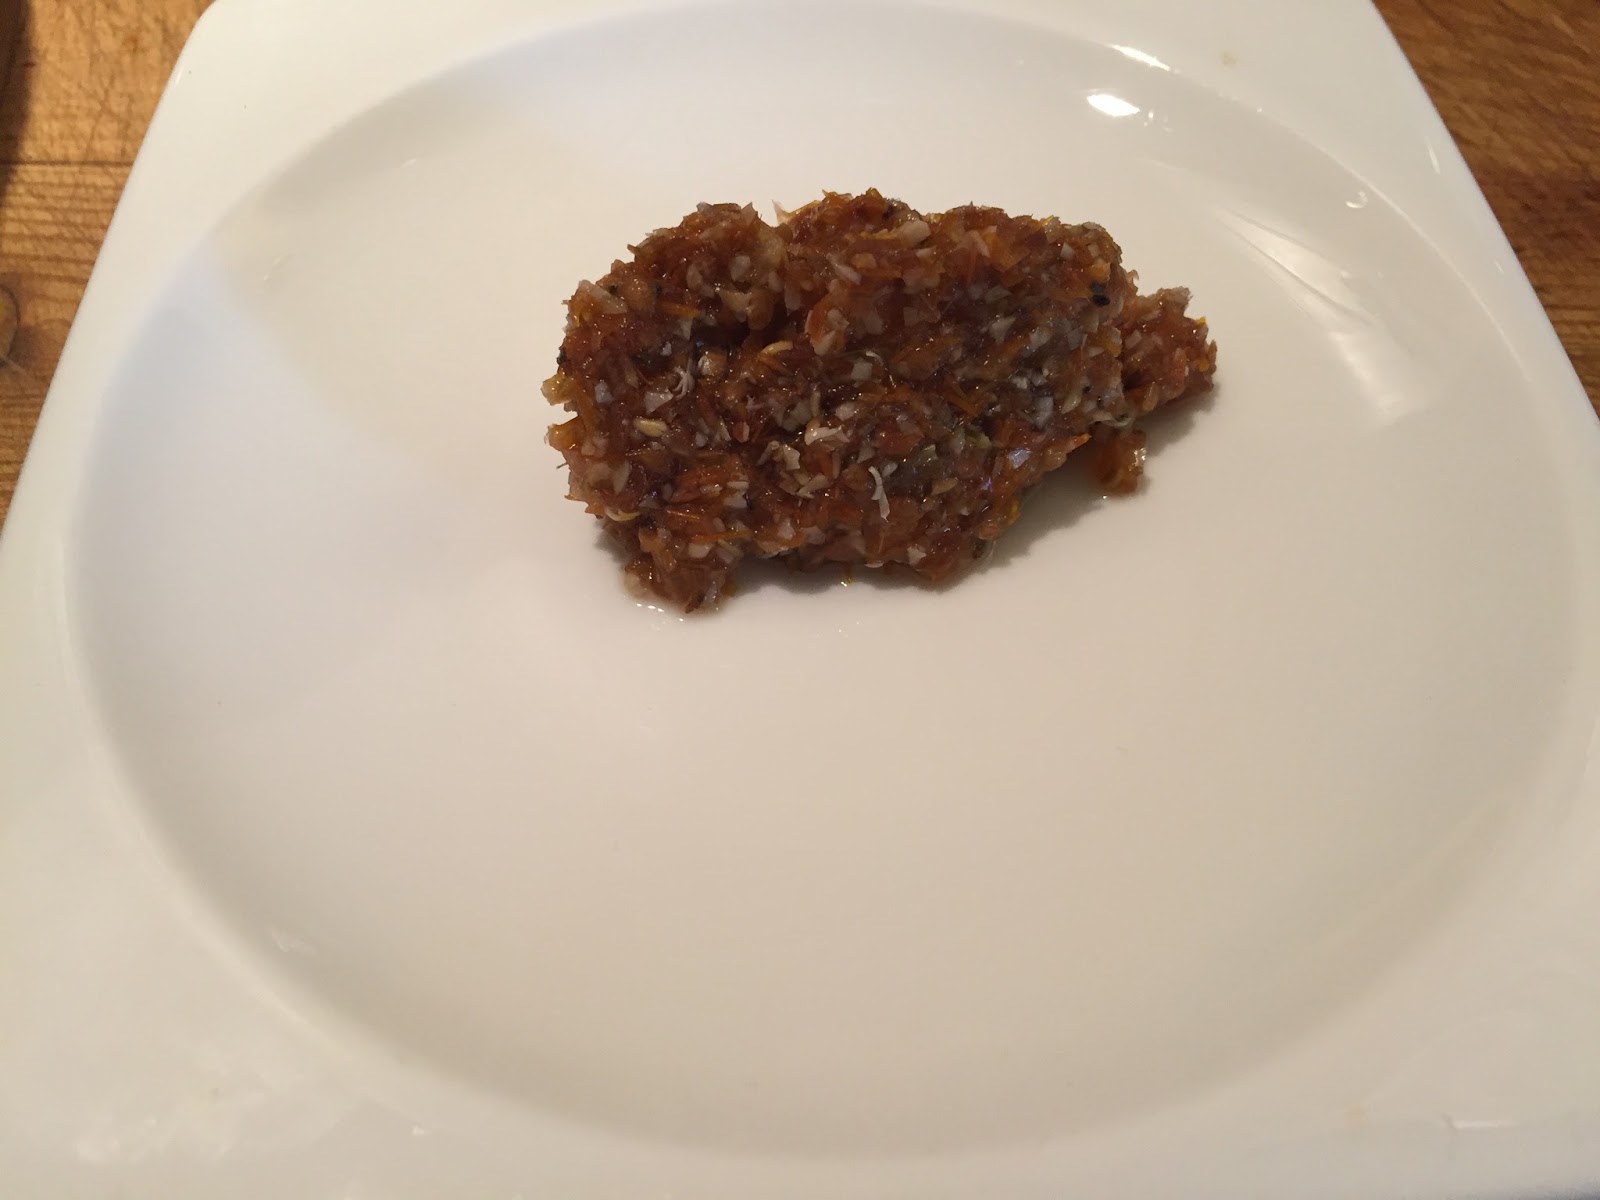
Less than a tablespoon of residue!

Notes
I photographed the residue from sieving to show what little there is, an illustration of just how wasteful it is to peel the squash.
The weights of the squash and onions can be varied without altering the finished result too much, so don't worry if your squash is a little larger or smaller, simply adjust the amount of stock.

Saturday 22 October 2016

Emergency Macaroons


In the UK if you ask anyone what a macaroon is, chances are they will describe the overpriced macaron which originating in France are now available and popular over here. French macaron of course are delicious, two light meringue based discs, sandwiched together with a delicious buttercream. This is all well and good but I fear we are forgetting a treat which has graced British tables at tea time for decades.
These macaroons are called emergency macaroons because a dear friend of mine who works as a GP at the coal face which is the NHS these days and I am pleased to send her a batch every now and again.
The addition of ground almonds makes them less sweet than the conventional recipe, but if you enjoy the sweeter stickier flavour of coconut in your macaroons, by all means replace the 100g of ground almonds with coconut.


For this recipe you will need;
Egg whites from 2 large eggs
80g of caster sugar
100g of desiccated coconut (unsweetened)
100g of ground almonds
A tiny pinch of sea salt

30g of dark chocolate for decoration.

Begin by whisking the egg whites to soft peaks, add the sugar and the salt and continue whisking for 2 minutes until stiff.
As with making French macaron, the point where it can all go a bit wrong is when you fold in the ground nuts. Gently fold the desiccated coconut and ground almonds into the stiff egg whites. The process will of course reduce the volume, but if you are careful about folding and stop as soon as the dry ingredients are fully incorporated, it will be fine.
Line a baking tray with baking parchment and scoop out the mixture into 12 equal mounds, I find an ice cream scoop ideal for this.
Bake for 30 minutes at 150C.
Melt the chocolate and drizzle over the cooled macaroons.


Notes:
This recipe makes 12 macaroons and when packed carefully in an old Adnam's gin bottle box, travel perfectly intact all the way to Newcastle for only £3.35, arriving the following day, bargain!  

Thursday 6 October 2016

Autumn Empanada


Many countries produce a savoury item of food which consists of a filling encased in pastry of some sort. Cornish pasties, samosas and empanadas are but a few.
I took the Spanish empanada as my inspiration in creating this dish. It's a vegetarian mix of vegetables and cheese and well worth making, even if you stop at the filling stage and serve it up as the best mashed potato ever, especially if you find getting young ones to eat vegetables a challenge. go on to put it in pastry and you have a convenient picnic food and I would suggest small rectangles served warm even make a good canapé.
On my way back from feeding the chickens this morning (they've given up laying but they still seem to want to eat) I picked a few things from the garden, today it was Jerusalem artichokes, chard, potatoes, tomatoes, onions and sage. Here is what I came up with.

For this recipe you will need;
Roughly 1,200g of vegetables, predominantly potatoes, today I used
2 small onions, chopped
3 cloves of garlic, grated
200g of fresh tomatoes, chopped
Chard leaves
300g of Jerusalem artichokes
750g of potatoes
3 or 4 sage leaves
1 tablespoon of rapeseed oil
1 teaspoon of Marigold Bouillon powder or 1/2 teaspoon of salt
1/2 teaspoon of freshly ground black pepper
A good pinch of cayenne

150g of good cheddar cheese grated.
250g of shortcrust pastry.

Begin by sweating the onion and garlic in the oil on a low heat in an oven proof pot that has a lid. After 2 or 3 minutes add the remaining vegetables and cook down until the tomatoes have released their liquid, about 7 to 10 minutes. Put on the lid and place in a moderate 160C oven for 45 minutes. Remove the lid and return to the oven until the liquid has all but dried out. It is important that the filling is not too wet, so time and care should be taken to dry the vegetables out.
Mash the cooked vegetables together with the seasoning and the cheese and allow to cool completely.

Roll out the pastry to form a rectangle roughly 20cm by 50cm. Carefully drape one half of the pastry into the baking tin, I use one that conveniently measure 18cm by 25cm, leaving the other half of the pastry ready to fold over to form the lid. Place the cooled filling onto the base and fold over the lid. Crimp around the edges and brush with either a little cream or an egg yolk if you fancy. I created a diamond pattern on mine but you really don't have to.
Bake at 180C for 45 to 50 minutes.
Serve warm.


Notes:
Obviously the ingredients of the filling can vary hugely for this recipe, if you grow your own vegetables or order in a veg box, simply use what is at hand. I like to make it mostly potato but that is entirely my preference, I find it holds together very well, especially when cut and served cold at a picnic. The secret to this simple list of ingredients transforming into a surprisingly delicious filling is the intensifying of flavours that happens when you cook them together in a sealed container in the oven.


Wednesday 1 June 2016

Honey & Currant Cake


Friends, Sue and Dick are enjoying honey from their own bees this year, so I decided creating a recipe for them for a cake sweetened with honey might be a good idea. Readers of my blog will know I'm always very disparaging about currants and in this house they remain banned in all Christmas baking, but they do provide a great dark flavour to this cake, and of course if you care about these things, extra roughage.


For this recipe you will need;

250g of softened, unsalted butter
250g of eggs,
200g of Self Raising flour
200g honey
140g of currants
100g of ground almonds
80g of caster sugar
1 flat teaspoon of baking powder
1/2 teaspoon of salt

Turkmenistan you are so welcome, making it 148

Line a 23cm square baking tin with baking parchment and turn on the oven to 180C.
In a food processor, begin by grinding up the currants to a pulp, add the butter and caster sugar and continue to blend until you have a smooth mix. Add the eggs, ground almonds and blend until you have a well amalgamated mix. Finally add the flour and baking powder and blend in short bursts for no longer than it takes to fully combine.
Transfer the mix to the prepared baking tin and place in the center of the oven, bake for 50 minutes when you should find a cocktail stick comes out clean when pushed into the middle of the cake.
Cool completely in the tin before turning out.

Notes:
As with all cakes that contain nuts, this cake will improve over a 2 or 3 days period.
Personally I wouldn't replace the currants with other dried fruit, currants are the least sweet and their slight bitter edge works well with the flavour of the honey.

Wednesday 9 March 2016

Sausage Rolls


These sausage rolls can be made small, cocktail size ideal with a negroni, or larger, forming an excellent picnic component. You can easily freeze them, either pre-baked or fully baked. I simply add an extra egg to my Glamorgan sausage recipe, making the mixture softer and easier to pipe. Along with a pack of all butter puff pastry, a savoury treat could not be easier. Truly delicious served within minutes of being baked.

Welcome Laos, bringing the number up to 147!

For this recipe you will need;
1 portion of Glamorgan sausage mix click here for the recipe
1 egg
1 pack of all butter puff pastry, ready rolled.

Begin by making the sausage mix, add an extra egg and process until you have a soft smooth mix. Fill a piping bag with the mix, I use a large disposable one for this, and I cut an opening at the point that allows a 2 centimeter wide, long sausage to be piped out.
Unroll the pastry from it's protective paper and on a lightly floured surface, roll the pastry even further to about half as big again. Divide into three long oblongs and pipe the filling along the middle of one piece of the pastry. I have done this so often that I now don't bother dividing up the pastry to begin with, hence the misleading photo below. Lift the edge of the pastry up and over the filling and using a fork press the two edges together to seal. Then divide the long sausage roll into the size you prefer. I find I can get around 18 out of each long length..
Transfer the sausage rolls to two large baking trays and bake in a hot oven 200C for 15 to 18 minutes.


If you wish to freeze these before baking, allow to fully thaw before you pop them into the oven.
If you have frozen them fully baked, simply pop them into a warm 140C oven for 10 minutes, directly from the freezer.

Tuesday 8 March 2016

Teacakes for toasting


It must be nearly sixty years since I toasted teacakes in front of the fire in the Welsh farmhouse where I grew up, The long brass fork was only just long enough to ensure I too didn't get toasted in the process. The teacakes then liberally spread with the butter my mother used to make, were quickly devoured. My recipe produces teacakes that are slightly different to the ones that are commercially available, in as much as they resemble brioche a little more than a bread bun. I prefer a lighter albeit richer teacake. I also prefer not to add spice or any other dried fruit to this tea time treat, we are so close now to Easter and I like hot cross buns to have the spice.


For this recipe you will need;
600g of strong white bread flour
75g of caster sugar
50g of unsalted butter
300ml of full fat milk
7g of easy mix dried yeast
2 eggs, lightly beaten
10g of salt
130g of raisins

Begin by melting the butter in a small saucepan then adding the milk. In a large bowl, place all the ingredients apart from the raisins, including the melted butter and milk mixture. Bring the ingredients together until you have a soft dough and knead for 5 minutes. Add the raisins and knead for a further 2 or 3 minutes. Leave the dough to rise until nearly doubled in volume. I find at this time of year this can easily take 3 or 4 hours. The extra time only helps the flavour to develop so I'm very happy about this.
Remove the dough from the bowl and on a lightly floured surface, gently divide the dough into 8 separate pieces. Take each piece and form into a bun shape. I find the easiest way to do this is to use my right hand to form the bun, cupping the dough and rolling it around  and around on my left hand. Play around with this method but at the end of the day simply form a bun shape anyway it suits you to do so. The important thing is to roll out the bun after forming it to flatten it. This is important because you want a rather shallow end result rather than a domed one, so that splitting and toasting is made easier.
Place the flattened buns on two large baking trays and leave again to rise until doubled in size.
Bake at 200C for 14 to 15 minutes.
These are best left overnight before splitting and toasting only on the cut side until a good golden brown colour. Spread with butter and serve warm.


Notes:

Raisins as with all dried fruit, that are exposed to the high heat of baking tend to burn, so if there are any exposed raisins I take them out and pop them underneath the teacakes so that they bake safely into their bases.
These teacakes freeze really well and will easily keep in the freezer for a couple of months.
I avoid glazing with a beaten egg before baking, it seems like a bit of a waste of an egg to me and the part of the teacake you never do see when enjoying them is the top.

Sunday 6 March 2016

Broccoli & Cheddar Soup


There are many soups which benefit from long slow cooking, my tomato soup click here for the recipe is a good example. This soup however requires little cooking and is ready in a comparatively short time. As with most soups this produces an optimum result from very few ingredients. There are many good cheddar type cheeses on the market, Lincolnshire Poacher and Godmanchester being two of my favourites. The better quality the cheese the happier you will be with the result. In this recipe I use leeks, sadly under used in my opinion, they provide all the nutritional benefits of onions, with a gentler flavour, easy to prepare and good value for money.

For this recipe you will need;
250g of sprouting broccoli
250g of trimmed leeks
220g of good quality, full flavoured cheddar
70g of cream cheese
1 egg yolk
1, 1/2 litres of vegetable stock
1 tablespoon of sofrito click here for the recipe
1 teaspoon of light olive oil
1/3 teaspoon of freshly grated nutmeg nutmeg
white pepper

Begin by sweating the chopped up leeks in the olive oil, along with the sofrito in a large saucepan for 5 minutes. Add the vegetable stock and simmer for 10 minutes. Add the broccoli and bring the stock back up to the boil. Simmer for a further 3 or 4 minutes only until the stems of the broccoli are tender. Any further cooking and you will lose the fresh green colour in the finished soup. Add the pepper and nutmeg.
Being very careful, since blending any hot liquids requires care, blend the soup in a jug blender in two batches, blending half of the cheddar and cream cheese with both, Add the egg yolk to one of the batches. I find removing the central part of the lid and holding a tea towel on the lid while I switch on at the lowest speed is the best way of avoiding hot soup brusting out all over the kitchen. Return the soup to the pan and very slowly bring it back up to just below simmering point. Serve with crusty bread.

Notes:
This soup requires careful reheating, bring it up to just below simmering slowly and don't overheat.

Saturday 5 March 2016

Garibaldi Biscuits


I must have been about seven or eight when I first came across Garibaldi biscuits. My parents would have been visiting a great aunt or some other aging relative and I remember the words "lets see if I can find a treat for these boys" being said. The treat in question and indeed questionable I did consider it, was a plate of these rather miserable biscuits. The only feature that distinguished them from the poorest of pastry was the odd little currant, flattened and beaten into submission before being baked to a fine desiccated state that rendered the finished biscuit, something you would only ever try once. I'm told now that there are many adults who actually enjoy Garibaldi biscuits, but for two young boys they went on the list of foods that adults gave us as a bit of a joke, Bourbon biscuits, another, the correct colour of course, the promise of chocolate but bearing no resemblance whatsoever to a chocolate biscuit. Woolworth's chocolate was probably the highest on the list, such a large box, so many chocolates, all refusing to melt and all tasting vaguely of soap and not in a good way. Ask the average Italian and they will tell you that they have never heard of a Garibaldi biscuit, though we are led to believe they are named after a Guiseppe Garibaldi, an Italian General who after a visit to England in 1854 inspired Jonathan Carr to invent the biscuit seven years later.
You may wonder why on earth I would offer this recipe for Garibaldi biscuits considering my early traumatic encounter with them, well the reason is I was convinced that there should be a way of making a rather delicious version of them and since I had an amount of left over pastry I attempted to make them. Readers of my blog will know how I feel about the dried fruit called currants, they have their place but not at Christmas, well this along with a good Eccles cake, is one of those places. The addition of lemon peel is important so do try to find one.

For this recipe you will need;
500g of pastry, Click here for the recipe
50g of caster sugar
100g of currants
The grated peel of one lemon

Begin by processing the currants in a food processor with the lemon peel and the sugar for half a minute, this has the effect of not only combining the ingredients but breaking some of the currants down so that they blend more with the pastry. If you don't wish to do this you can skip this step and merely mix together the currants, sugar and grated peel.
Divide the pastry in half and roll out each half to an oblong roughly 5ml thick, place the currant mixture on one half, as close to the edge as you can, don't worry about spillage at this stage, fugitive currants can easily be recaptured in the rolling out. Cover with the second piece of pastry and roll out to be certainly no thicker than 5ml and a little thinner will do no harm. Trim and divide using either a pizza wheel cutter or as I do, a wooden pastry wheel. The trimmings can be re-rolled and still used, though they are slightly messier.
Place on two baking sheets lined with baking parchment and bake for 15 minutes at 180C, turn down the heat to 100C and leave the biscuits in the oven for a further hour to completely dry out and turn crisp. Store in an airtight container and serve with tea or coffee.


Notes:
As with other recipes you can come up with adaptations of this basic recipe, using chopped nuts in place of currants, and spices such as cinnamon or nutmeg along with the sugar.
The result is far superior to the rather palid dry offerings you find in the supermarket, where the currants seem to have been rationed along with any flavour. I think they are somewhere between a Garibaldi biscuit and a Chorley cake and as such I am very pleased to offer you this tea time treat, my Garibaldi biscuit.
Some of the sugar will caramelise and seep out during the cooking, this, on cooling will form a delicious crisp coating.

Wednesday 2 March 2016

Cauliflower and Roasted Carrot Gratin


Cauliflower cheese is occasionally absolutely what I fancy, definitely on my list of comfort foods. Take a little trouble to upgrade it by the addition of an extra ingredient, in this case carrots, and you have a dish that will grace any supper table. Roasting the carrots intensifies the flavour, the sweetness working perfectly with the savoury flavour of the cheddar cheese. This recipe serves 4 but it easily scaled up to serve 6-8.

For this recipe you will need;
300g (a small) cauliflower cut into florets.
4oog of carrots
240 full flavoured cheddar cheese
150ml of milk
150ml of double cream
150g of breadcrumbs
30g of unsalted butter
1 tablespoon of plain flour
1 teaspoon of light olive oil
1/2 teaspoon of sea salt
1 teaspoon of bouillon powder or 1 second 1/2 teaspoon of salt
1/2 teaspoon of freshly ground black pepper
1/4 teaspoon of cayenne pepper.

Begin by roasting the carrots, cut them into 1 centimeter discs, toss them in a teaspoon of oil and the 1/2 teaspoon of sea salt and roast in a medium oven 180C for 30 minutes.
Meanwhile place the butter and milk in a lidded saucepan, place on a medium heat and bring to the boil. Once the milk reaches the boil, put on the lid and switch off the heat.
Prepare the cheese by grating 200g of it with the plain flour. I do this in a food processor, which is incredibly easy. Add the grated cheese flour mix to the cooked cauliflower along with the seasoning and the double cream. Bring this up to a gentle simmer. stirring continuously and allow to simmer on the lowest possible heat for 10 minutes in order to remove any raw flavour from the flour. Add the carrots as soon as they are cooked and stir in. Transfer to a shallow ovenproof dish.
Prepare the topping by grating the remaining cheese along with the breadcrumbs, again a food processor makes light work of this task. Top with the cheese crumb breadcrumbs and bake in a medium 180C oven for 30 minutes.


Half the mixture in the dish, before covering up the great pattern on the bottom.


Notes: this dish works equally well with calabrese, whatever you choose, do include the stalk cut up into small pieces, it is so often thrown away and it is every bit as flavourful, tender and nutritious as the florets.
For some unfathomable reason, some people throw away bread that has become a bit dry. This is the sort of dish, along with countless others, that makes excellent use of such bread, in fact fresh bread would not be as easy to use. If bread dries out and you are not in the mood to make a dish such as this, simply freeze the bread until you are. Frozen bread can easily be made into breadcrumbs once thawed, a matter of minutes.

Monday 29 February 2016

Spiced Red Kidney Bean Soup


I've given up parsley for Lent and we still have weeks and weeks to go, it already feels like ages. This soup recipe however uses bay leaves, two of them fresh if you are lucky enough to have a bay tree or live in Fentiman Road where the local pub has a magnificent one. The other particular flavourings are cumin, chilli and a tiny but relevant amount of cinnamon. The result is a delicious warming soup with definite flavours of Central America. How else could you feed 4 to 6 people with a hearty luncheon dish using little more than a carrot, a leek, an onion and some kidney beans.

For thie recipe you will need;
300g of cooked red kidney beans
80g of chopped carrots
80g of chopped leek
1 small onion
1 tablespoon of sofrito click here for the recipe
1 tablespoon of tomato oil click here for the recipe
1 tablespoon of good tomato puree
1 teaspoon of cumin seeds
1 teaspoon of chili flakes
2 teaspoons of Pul Biber chilli
1/2 teaspoon of ground black pepper
1/3 teaspoon of ground cinnamon
2 bay leaves
1/2 tablespoon of light olive oil
2 litres of vegetable stock
50g of unsalted butter

Begin by gently frying the spices in the light olive oil in a large saucepan for 1 minute. Add the chopped vegetables and the sofrito. Sweat the vegetables gently for 3 to 4 minutes before adding the tomato puree and the tomato oil, continue to cook over a gentle heat for a further 3 to 4 minutes. I've said it before but it's essential to cook out tomato puree whenever you are using it in order to soften and enrich the flavour. Add the cooked beans and the vegetable stock, throw in the bay leaves and pop on a lid, simmer the soup for a good hour to an hour and a half.
I like to think I invented this next step, a method of enriching any soup without having to add cream and in so doing, giving it in my opinion, too dairy a flavour. I blend some or all of a soup with a small amount of butter. I restrict the amount of oil used in the first place in order to avoid the soup being to oily. In this case I blend about half the soup, taking care to include the bulk of the beans and to remove the bay leaves before starting. I want to end up with a soup that has some texture and this method works well. Add the butter and taking the precautions you always would whilst blending any hot liquid, blend until you have a smooth result. Return the blended soup to the remaining soup in the saucepan and heat through before serving.

Notes:
It must be obvious to people that the weights for the vegetables are a bit arbitrary, I still have carrots I am happily pulling up in my garden and a few stray leeks, you can always adjust these weights to suit what you have in the house. It is also true that you could choose alternative beans, borlotti or pinto beans would be good as indeed flageolet beans would, though of course they would produce subtly different flavoured soups. As with all good recipes this is one that I would hope people will adapt to suit their pantry's contents.

Wednesday 10 February 2016

February Cake


You know what it's like, you buy an extra pot of double cream, thinking that the Bishop of Ely or the Ukrainian Ambassador might drop in for tea and when no such dignitary turns up and the use by date is getting close, you have to come up with a plan. I decided to create a recipe for a chocolate cake, not the intense deep chocolate flavour of my moist chocolate cake click here for the recipe but a cake with a light chocolate flavour, utilising a good milk chocolate, I favour Green & Black. I apologise now for the fact that this recipe relies on a food processor and an electric whisk, but it's the first day of Lent, so perfect timing.


For this recipe you will need;
250g of self raising flour
250g of caster sugar
4 medium eggs
300g of double cream (sadly not available in the United States)
150g of good quality milk chocolate
1 teaspoon of vanilla paste
1/4 teaspoon of salt

Heat the oven to 180C, prepare 2, 20c shallow cake tins by lining with baking parchment on the base and greasing the sides with softened butter.
Begin by processing the flour and chocolate in a food processor until you have a fine, pale chocolate powder with only the odd speck of chocolate, this should take no more than a minute. Whisk the eggs, sugar, vanilla and salt until you have a thick pale creamy foam. In another bowl whip the cream until you have soft peaks. fold the whipped cream into the egg and sugar mix and finally fold in the chocolate flour. Transfer to the prepared cake tins and bake in the oven for 35 minutes. Cool completely before turning out of the tins. I sandwiched mine together with a butter cream frosting, flavoured with chocolate hazelnut spread and cream cheese. I sprinkled a few toasted hazelnuts on the top having spread half the frosting on first.

Notes:
Processing the chocolate in the flour makes it possible to achieve a fine grind, it also means the ingredient gets evenly distributed. Its a really good method of grinding up ingredients such as dates, crystallised ginger featured in the January cake, nuts, liquorice etc.

Saturday 30 January 2016

The Chaplain's Bake


When a rather ugly but delicious tasting celeriac has been staring back at you for over a week, it's time to get the thinking hat on. A savoury bake was the answer. This combines layers of roasted aubergine and a creamy central layer of celeriac, potato and gruyere. It's delicious served hot with roasted potato skins and for me a favourite at this time of year, sprouting broccoli. Cook the broccoli as you like but I have to say I am increasingly fond of charring brassicas, in this case I cooked the broccoli in a shallow lidded pan with only a tablespoon of water, a little salt and a knob of butter, cook on a medium heat until the broccoli boils dry then be brave and allow the remaining butter to fry the contents until the bottom parts of the broccoli have taken on some colour, delicious!

For this recipe you will need; (feeds six)

2 large aubergine, weighing in total 700g
200g of celeriac
200g of potatoes
200g of double cream
180g of gruyere cheese, grated
1 tablespoon of tomato oil (optional) click here for the recipe
1 tablespoon of olive oil
2 teaspoons of bouillon powder
1/2 teaspoon of black pepper
100ml of water
2 teaspoons of salt

Begin by slicing the aubergine and placing in a bowl, put in the salt and give them a good toss to ensure the salt touches each slice. This will draw out some of the liquid, not as is commonly believed to draw out bitterness but to make dressing in a little oil, easier when it comes to cooking. Set to one side.
Peel the celeriac and cut up as though you were preparing potatoes for chips, do the same with the potatoes, I don't bother peeling potatoes but do peel them if you feel compelled to do so. Cook the celeriac and potatoes in only 100ml of water, bouillon powder and pepper until tender, on a low heat in a lidded pan. Keep an eye on them, there should be no water left when the vegetables are cooked, if there is a little, simply continue cooking with the lid off. When tender, take off the heat and stir in the cream and finally, the cheese, keeping 50g back to sprinkle on top prior to cooking. Set to one side.
Rinse off any liquid and salt from the aubergine slices and toss in the olive oil. On a medium heat, cook the slices in a dry pan, the oily coating should be sufficient to prevent sticking. Continue until each slice is nicely browned.
Assembling the dish.
In an ovenproof dish, a lasagna dish is perfect, begin with a layer of aubergine (half), brush with the tomato oil. Pile on all of the celeriac and potato mix and top with the remaining aubergine slices, brush with the tomato oil and sprinkle the last of the cheese on top. Bake in a moderate 180C oven for 15 to 20 minutes until bubbling and toasted.


Notes:
This dish will work very well if you substitute parsnips for celeriac, in that case use only parsnips and double the weight to 400g.