Monday, 24 September 2012

White Bread with commercial yeast

Occasionally, despite enjoying the best bread baked using wild yeast, I fancy a loaf of white bread baked using commercial yeast. There are few things finer than a slice of this soft tender bread, almost hot from the oven spread with good quality unsalted butter and some home made jam; the current jam is gooseberry and ginger made a few weeks ago when gooseberries where in abundance.

I made gooseberry, gooseberry and elderflower and finally gooseberry and ginger, using glacé ginger. Each has it's merits and all have succeeded in winning me over to gooseberries.

Back to the bread, even if you decide to use commercial yeast, and for me that means easy blend yeast, the type you find in sachets that you can simply add to the other ingredients, it is possible to improve the final result greatly by simply slowing down the whole process. I make the dough last thing before going to bed and place it in an oiled polythene bag in the fridge. You need to be a little careful to position the bag so that the contents don't migrate in the fridge, because even at 5 degrees, the yeast will do it's work and the dough will rise a little.


In the morning, at some point simply take the dough out of the fridge, stretch and fold it a couple of times and put it back to keep cool. If I plan to bake around early evening, I take the dough out of the fridge early afternoon, I leave it to gradually come back to room temperature and shape it at least a couple of hours before baking. This process works well for all types of loaves, and pizza. Extending the process in this way improves not only the flavour and texture, but also the keeping qualities with virtually no extra hands on work.

To make two small loaves you will need:
600g of Strong white bread flour
1 packet of easy blend yeast
9g of salt
400 ml of cold water.

Mix all ingredients to form a soft by not sticky dough. Knead for a few minutes only before placing in a polythene bag that you have dribbled a teaspoon of oil into and squished together to line the bag with an oily film. This makes tipping the dough out easier. leave in the fridge overnight.
In the morning, tip the dough out onto a work surface and stretch & fold the dough a couple of times before returning it to the fridge.
Roughly 5 hours before needing to bake the bread, tip the dough out of the bag onto a work surface, stretch & fold a couple of times and leave covered with a tea towel to come back to room temperature. 2 hours before baking form the dough into two small loaves and leave to rise until double in size. heat the oven to 220 degrees C and bake the loaves for 25 minutes until golden, the loaves should produce a hollow sound when the base is tapped.


Tuesday, 18 September 2012

Miche with 20% spelt

The addition of spelt flour in this bread certainly adds flavour, I used Prior's organic white flour 


You will need:
For activating the starter,
100g of starter from the fridge
100g of Strong white bread flour, I used Prior's organic white for this batch
100g of water.

For the ferment,
All of the activated starter
200g of Strong white bread flour
200g of water

For the main dough,
All of the ferment
800g of Strong white bread flour
200g of white spelt flour
500g of water
20g of salt


Activate the starter by mixing all the ingredients together are leaving, covered until you begin to see bubbles appearing on the surface.

Take the activated starter and add the ferment ingredients, stir well and leave covered until the surface shows a healthy amount of activity See fig 1. Add all the main dough ingredients except the salt and if using an electric mixer mix on a medium speed for 3-4 minutes. Leave the dough covered for a minimum of 8 hours. At this point I go to bed.

After the bulk rising time, add the salt and mix again on a medium speed for 4-5 minutes to develop the gluten.

Leave the dough, covered, to rise for and hour. Stretch and fold the dough to further develop the gluten. Repeat the stretching and folding two more times at 1 hourly intervals.


Divide the dough into 2 equal pieces and shape into boule. Place seam side up in well floured lined banneton. Leave, covered for 2 - 3 hours until doubled in size. Tip the first loaf out onto a heated pizza stone or as I do, a hot cast iron flat griddle, slash and bake in an oven pre heated to 220 degrees C, for 35 to 40 minutes. After 15 minutes you can move the first loaf onto another shelf in order to repeat the process with the remaining loaf.


Notes:
I used only 20% white spelt flour, if I was using the Strong white flour I sometimes use I would have increased the percentage of spelt. The mix is up to you, it depends largely on the density of the finished loaf that you are happy with.


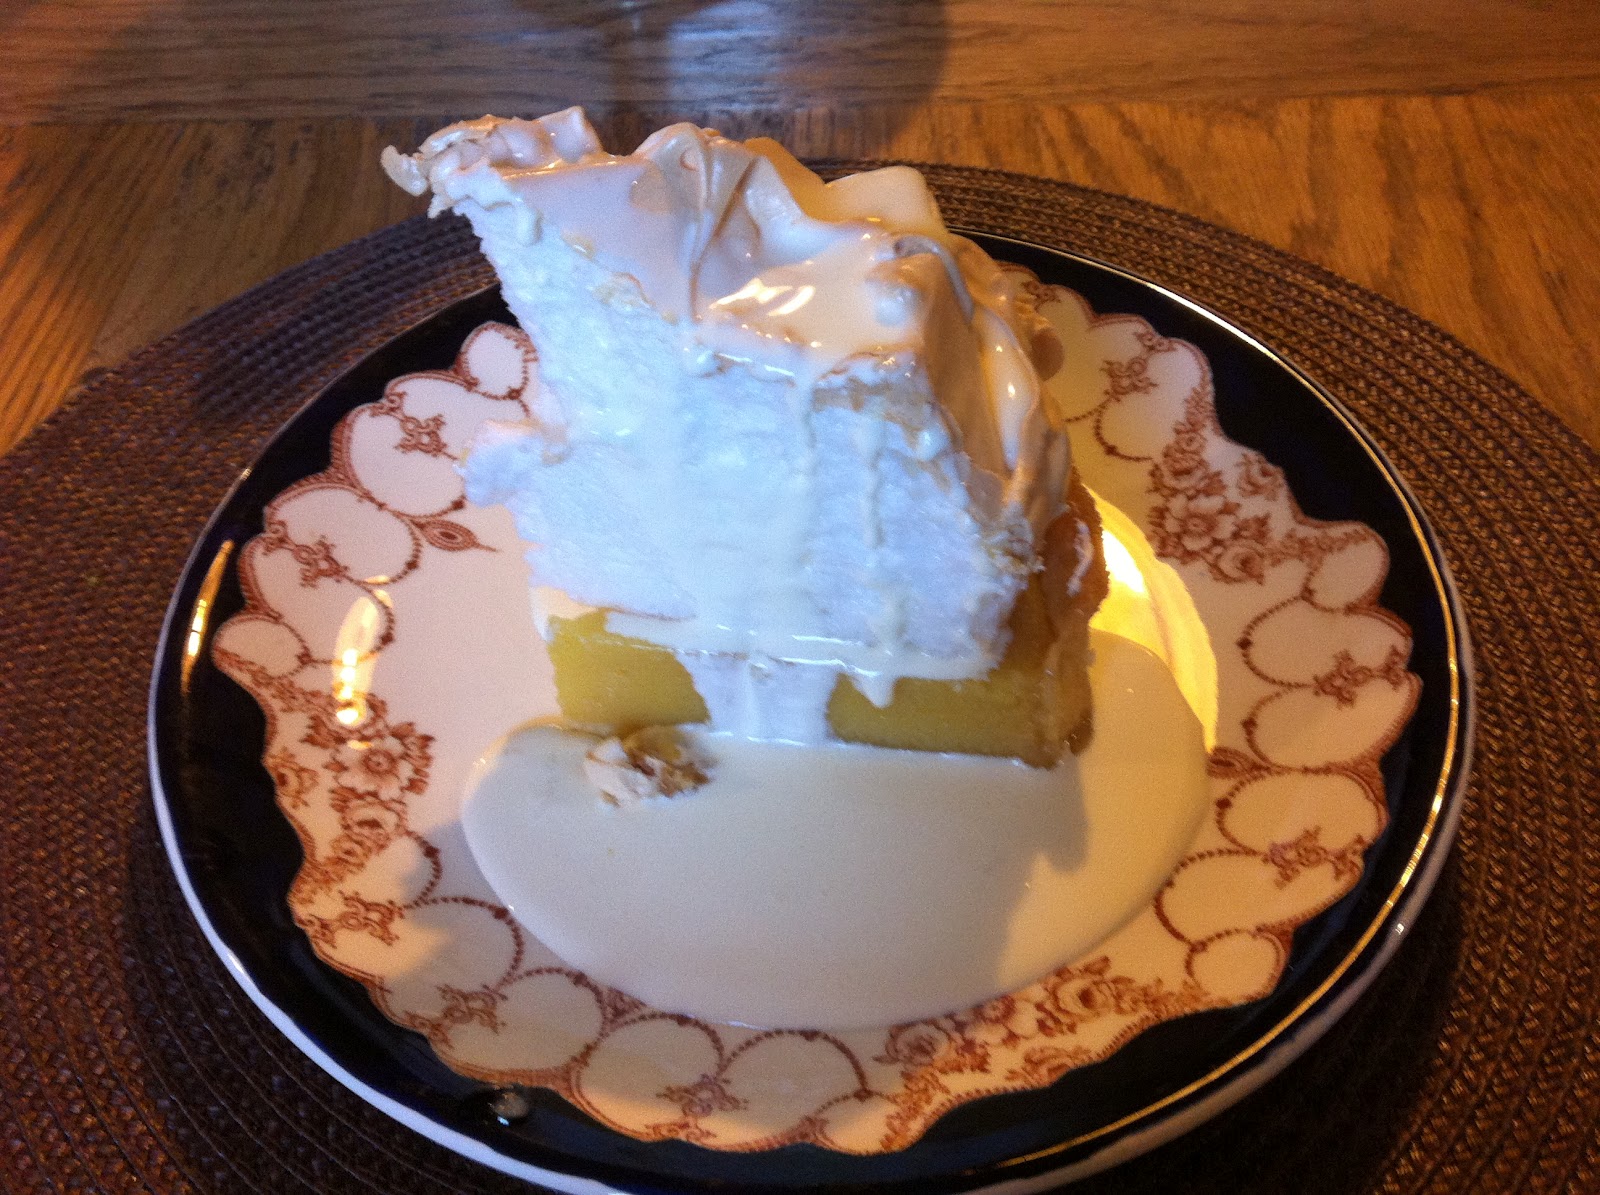
Lemon Meringue Pie

Lemon meringue pie is one of the lasting memories from my youth, in those days the meringue was thinner and the filling was often made using a packet of powder which you added  egg yolks and water ton and cooked until thickened; the lemon flavour came from a small capsule that resembled a cod liver oil capsule. There were clear instructions to keep stirring the mixture while it gently simmered until the lemon capsule had burst, releasing the essential flavour. The egg whites would then be whisked up with sugar to create the meringue, we felt very modern indeed.


These days making lemon meringue pie utilises the extra eggs I have on my hands from time to time.

You will need:

For the sweet pastry:

70g of unsalted butter, chilled
140g of plain flour
30g of sugar
1 egg yolk
pinch of salt
enough water to form a dough

For the lemon filling:

6 egg yolks and 1 whole egg
200g of sugar
The juice and peeled rind of 6 lemons
150g of butter.

For the meringue:

6 egg whites
150g of sugar


Make the pastry, place the flour, sugar, salt and chilled butter cut up into small pieces into the bowl of a food processor and pulse until the mix resembles small breadcrumbs. Add the egg and pulse again until it has disappeared  into the mix, at this point add only as much chilled water as possible to bring the mix together into a firm but pliable dough. If you add more water than necessary at this point the pastry will not have such a tender crisp texture, so add a little, pulse a little and add only as much as you need.

Place the pastry to rest for 15 minutes. I find the fridge too cold for this making rolling out difficult. However, after rolling out the pastry and lining a 20c cake by 4c baking tin, I put the pastry lined tin in the fridge for half and hour to firm up and dry out a little.

Pre heat the oven to 200 degrees C, place a piece of parchment paper onto the pastry, and place ceramic baking beans on top of the paper. If you don't have baking beans, rice that you keep just for this purpose will do well. The aim is to weight down the pastry so that it doesn't rise during the baking process. cut the parchment paper large enough to overlap the tin so that removing the beans is made easier.
Bake the pastry in the oven for 15 minutes, take the tin out and carefully remove the parchment paper and beans and return the pastry to the oven with the heat reduced to 180 degrees for a further 10 minutes. Remove and set to one side.


Make the lemon curd filling, peel the lemons with a potato peeler (you need to avoid any of the white pith at this point) and place in a food processor with the sugar and switch the processor on for 2 minutes to grind the rind up as fine as possible. I find this method extracts the most flovour out of the rind. Place the sugar in a pan along with the juice of the lemons and bring up to a simmer or until the sugar is completely dissolved. If you find the process of grinding up the rind and sugar didn't make the rind fine enough you can sieve the dissolved sugary juice at this point. Allow the mix to cool for a few minutes while you cut up the butter, add the butter and 6 egg yolks to the mix and place back in the pan and on a medium heat, slowly whisk the mix, you will fnd the butter melts at which point it's important to avoid heating the mix too much. The aim is to heat only until the egg yolks thicken the mix, turn the heat down and do it more slowly if you're anxious. Take the thickened lemony curd off the heat and allow to cool for 5 minutes, whisk in the whole egg.

When the baked pastry case has cooled for a few minutes after baking, pour the lemon mixture into the pastry case and return to the oven for 20 minutes at 150 degrees C. remove and alow to cool completely/


Make the meringue, whisk the 6 egg whites until they form soft peaks, add the sugar, I add it all at once, continue whisking for a few minutes until you have firm peaks and the sugar is completely dissolved. Meringues weep when the sugar isn't fully dissolved.

Pile the meringue onto the cooled base and bake at 150 degrees C for 20 to 25 minutes until the top is slightly golden.


Notes:

This recipe may well look like too much work (easy to understand why the packet became available all those years ago) but the effort is certainly worth it, the end result is a delicious sweet and lemony treat, a variety of textures and with the addition of pouring cream, a perfect dessert.

Bonus! the process of making the lemon filling at least up until the point where you add the extra egg, you have actually made lemon curd which can be placed in a sterilised jar and kept in the fridge to use on scones or used to sandwich a sponge cake.

The pastry will shrink a little from the side of the tin but I find it best to leave the finished lemon meringue pie in the baking tin (loose bottomed) until just prior to serving.


You can make the base complete with set lemon filling up to a day before, but add the meringue and bake only on the day it is to be served.


Tuesday, 11 September 2012

Double Chocolate Oat Cookies

I have been sitting watching a film I remember enjoying back in the sixties but somehow today I am distracted. The thing that I am thinking about instead of poor Thomas More's problems, is creating a new chocolate cookie from what I have in my cupboard, to have with coffee when Sylvia comes over tomorrow morning. This is the result, reasonably high in fibre and I do know someone who would claim they qualify as one of his five a day, the sultanas!


To make around 30 cookies you will need:

125g of oats
100g of SR flour
175g of muscovado sugar
125g of melted unsalted butter
75g of dark chocolate
50g of chocolate chips
50g of golden sultanas
50g of chopped pecan nuts
1 teaspoon of vanilla essence 
1 medium egg
large pinch of salt

Line 2 baking sheets with parchment paper and heat the oven to 180 degrees C.

Place the oats, flour and chocolate in a blender and blend for 30 seconds, take off the lid and redistribute the mix before blending for another 30 seconds, the aim is to grind the oats up a little. Place the contents of the blender in a large bowl and add the remaining ingredients except the chocolate chips and mix to form a soft sticky dough. Stir in the chocolate chips.

Take dessertspoons of the mix and place well apart on the baking sheets. Bake for 14 minutes, cool on a cooling rack.


 Notes:
You can vary these by using hazelnuts instead of pecans, white chocolate chips instead of dark chocolate and using different dried fruit, cherries would work well, you could also leave out the dried fruit and put in chopped crystalised ginger.

Adding the melted butter while it is still hot to the mix melts the chocolate that has been ground up, delaying adding the chocolate chips allows you to have whole chocolate chips in the finished cookie.

These would make excellent ice cream sandwiches, simply sandwich two together with a good quality vanilla ice cream.


Monday, 10 September 2012

Roasted flour bread


While baking my last batch of baking I placed a baking tray in the oven containing 200g of Prior's flour. I left it in at 220 degrees C for roughly 10 minutes, checking frequently to make sure the flour didn't become too dark. All flours are going to vary in water content so each will need to be watched as the colour turns from a creamy white to a milky coffee colour. You may find you need to take the tray out and stir the flour a little to ensure even baking. The end result is flour which you can sieve and keep to use in baking a batch of roasted flour bread.


You will need:
For activating the starter,
100g of starter from the fridge
100g of Strong white bread flour, I used Prior's organic white for this batch
100g of water.

For the ferment,
All of the activated starter
200g of Strong white bread flour
200g of water

For the main dough,
All of the ferment
800g of Strong white bread flour
200g of roasted white bread flour
450g of water
20g of salt


Activate the starter by mixing all the ingredients together are leaving, covered until you begin to see bubbles appearing on the surface.

Take the activated starter and add the ferment ingredients, stir well and leave covered until the surface shows a healthy amount of activity See fig 1. Add all the main dough ingredients except the salt and if using an electric mixer mix on a medium speed for 3-4 minutes. Leave the dough covered for a minimum of 8 hours. At this point I go to bed.

After the bulk rising time, add the salt and mix again on a medium speed for 4-5 minutes to develop the gluten.

Leave the dough, covered, to rise for and hour. Stretch and fold the dough to further develop the gluten. Repeat the stretching and folding two more times at 1 hourly intervals.


Divide and shape the dough into 3 oval loaves and place seam side up on a well floured linen cloth to rise for 2-3 hours until nearly doubled in size.

Slash the loaves and bake in a hot oven 220 degrees C for 30 - 35 minutes. I transfer my loaves onto a pre-heated cast iron flat griddle and bake them one at a time, moving the loaf onto a different shelf in the oven after 15 minutes in order to re-use the griddle, a pizza stone will serve the same purpose.


 Notes:
The choice of shape for your finsihed loaf is up to you of course,  I lean towards battard or oval more than boules because I have more even sized slices when it comes to eating them.

It's entirely possible to take care not to disturb the large holes formed during the rising, stretching and folding process, simply avoid knocking the dough back too much. Whereas I too think the large holes are attractive and often a sign that a natural ferment has been used, when it comes to buttering toast, large holes are just that bit too impractical and so I knead my dough a little more when it comes to shaping.