Friday 5 December 2014

Balliol Madeira Cake


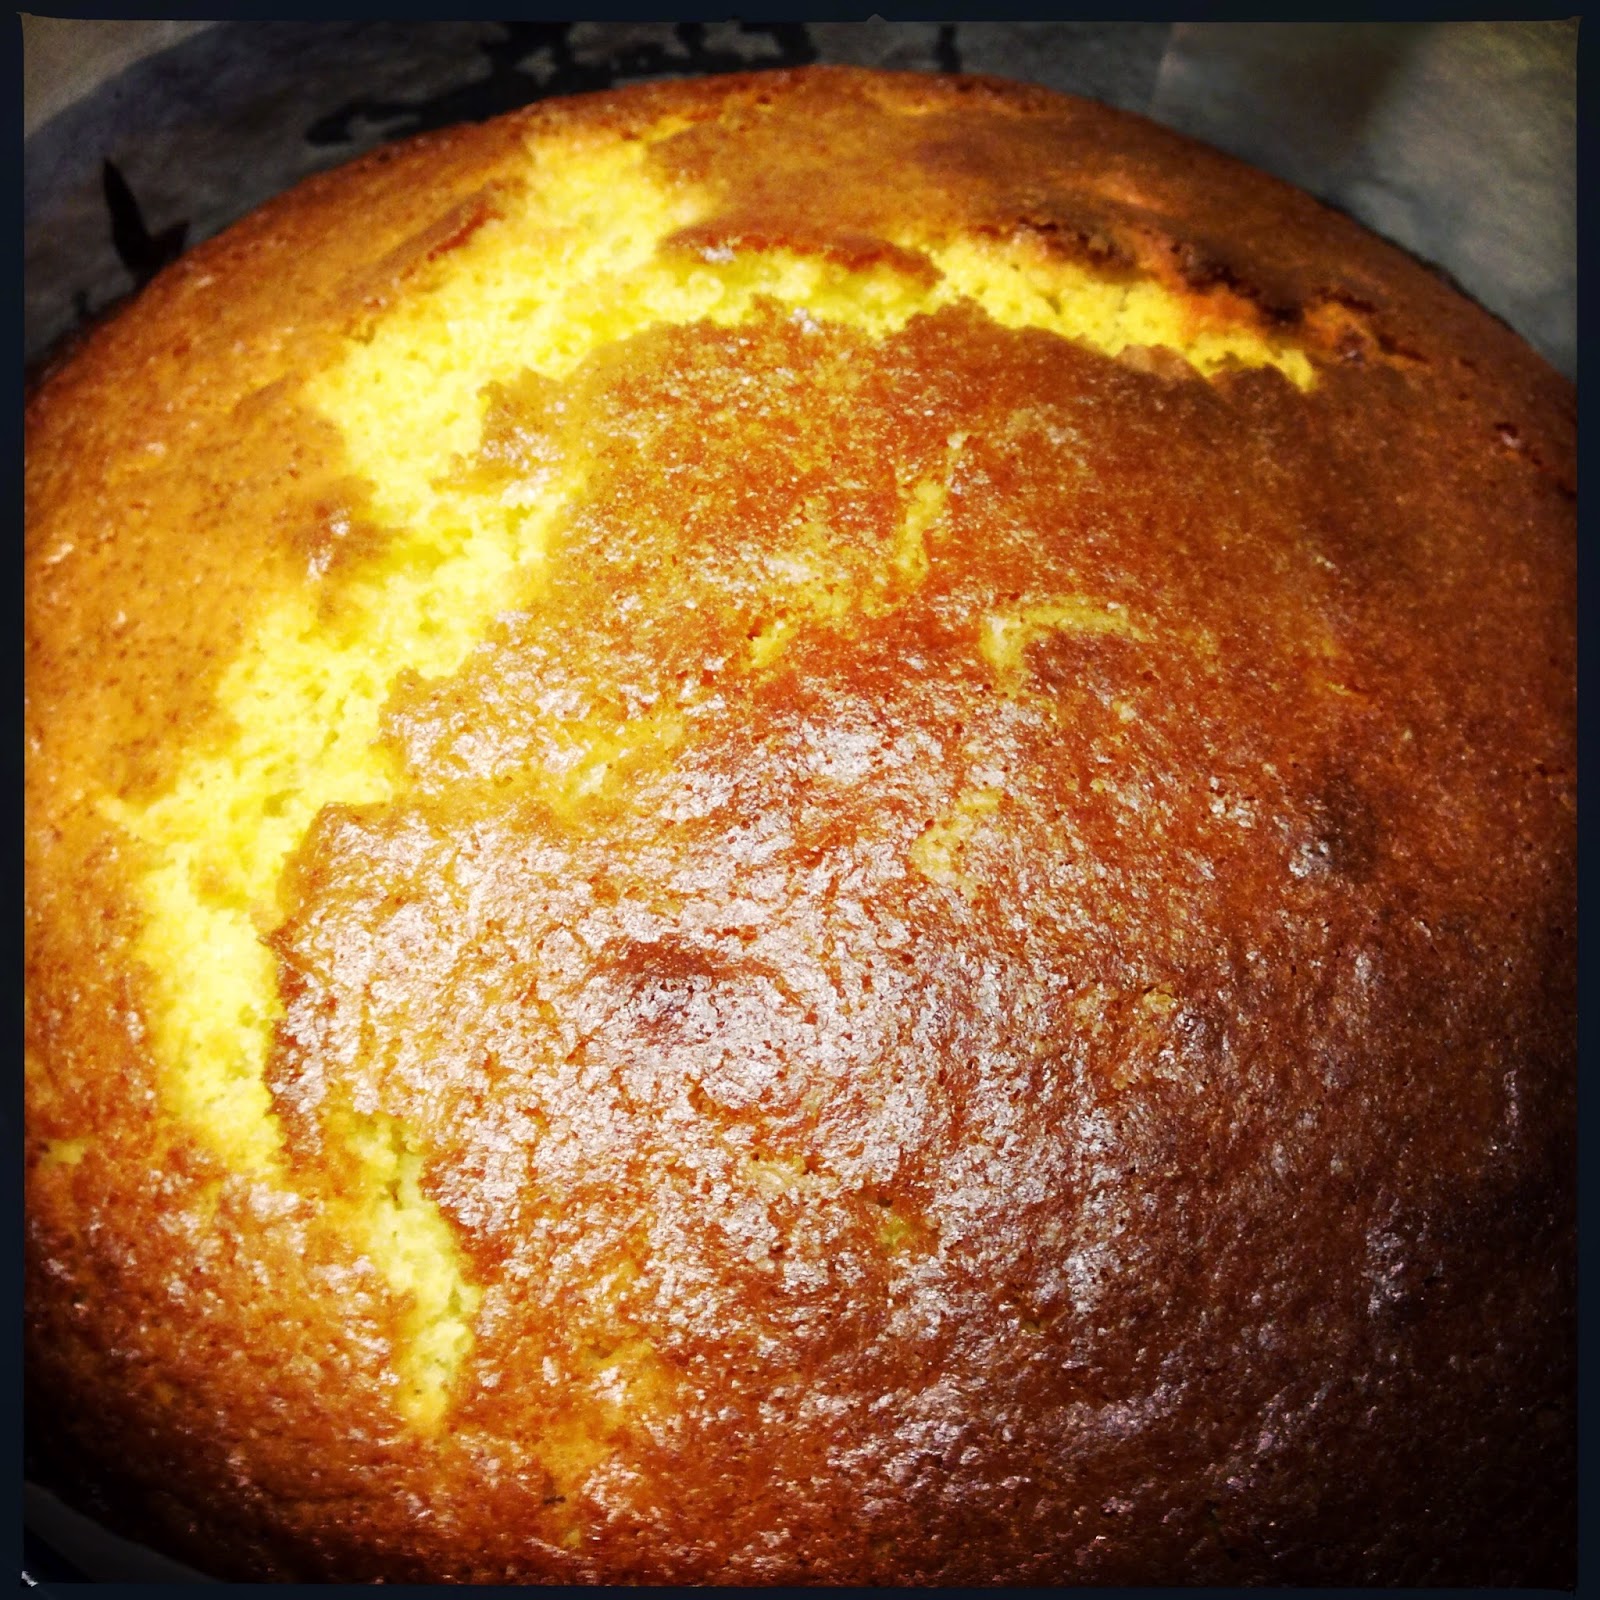
Bruce has taken on the role of Chaplain at Balliol College, Oxford; so I thought a celebration cake was in order and what better than a Madeira cake. Few will argue that a Madeira cake isn't one of the very best cakes ever created and yet, ironically, finding a good quality one that's available commercially is nigh on impossible. The Madeira cakes available at the shops are dreadful and only good for mopping up the odd spillage sadly not heavy enough to prop a door open.
I created this recipe, based on an old Kinsey family recipe, using beurre noisette, easy enough to make and certainly worth the extra effort. Bruce himself is an excellent cake maker and I am sure his Great Grand Mama would approve.


Welcome to the people of Anguilla, bringing the number up to 136!


For this recipe you will need;
300g of Self Raising flour
250g of caster sugar
250g of unsalted butter
80g of sour cream
4 medium eggs
100g of ground almonds
A pinch of salt

Begin by making the beurre noisette, simply brown butter which as the French term suggests takes on a nutty flavour. Place the butter in a small pan and on a low heat melt it and continue heating gently until it stops foaming. At this point strain it through a piece of kitchen paper towel placed in a sieve over a bowl. Strain out the milk solids. You should end up with clear, golden melted butter. Return the butter to the pan and again on a gentle heat continue heating until the butter turns a nut brown, be careful not to go beyond to a darker colour. Allow to cool to room temperature.
Prepare a large loaf tin, I usually line mine with parchment paper, turn on the oven to 170C.
Meanwhile whisk the eggs and sugar until they form a creamy foam. Whisk together the sour cream, salt and the beurre noisette, whisk into the sugar and egg mix and fold in the flour and ground almonds. Once the dry ingredients are fully incorporated, pour into the prepared laof tin and place in the center of the oven. Bake for 1 hour or until a wooden skewer comes out clean when pushed into the center of the cake.

Algy is very fond of keeping his nose just under the rug

If you wish you can substitute ground hazelnuts for the ground almonds, also toasting the ground almonds and allowing them cool completely before using, will enhance the flavour.

Wednesday 8 October 2014

Pear Purée Cake


This cake is subtly flavoured with pear, incorporating a pear purée, which is easily made by cooking pears until soft and processing in either a food processor or blender until you have a smooth purée.
I always like the flavour of vanilla with pear so unlike a cake made using apple purée, where cinnamon or clove would be a good addition, I use a little of my home made vanilla extract click here for the recipe. My two chief tasters, Sue & Dick both agreed this cake didn't taste of pear, Dick was prepared to say it tasted a little of pear once he knew it was supposed to, but I have to admit, it's very subtle. The main thing is, this is a perfect recipe for a delicate flavoured Madeira style cake and has less fat in than a conventional Madeira cake.


For this recipe you will need;
300g of Self Raising flour
250g of soft unsalted butter
250g of caster sugar
150g of pear purée
50g of Greek yogurt
4 eggs
1 teaspoon of good vanilla extract (this item was originally missing, until kindly pointed out by a reader, thank you)
1/2 teaspoon of salt

Prepare a 20cm by 10cm round baking tin by lining with baking parchment. Switch on the oven to 180C.
Cream together the butter and caster sugar until fluffy. Add the vanilla, salt and beat in the eggs, one at a time. Thoroughly mix in the pear purée and the yogurt and finally fold in the flour until completely incorporated. Place the mix into the cake tin and bake in the centre of the oven for 1 hour or until a wooden skewer comes out clean when pushed into the centre of the cake. Allow to cool before turning out.

Notes:
The cake has the texture of the best Madeira cake, light and moist with a closer crumb than a sponge cake.

Swiss Chard & Cheddar Rissoles


I grow a lot of Swiss Chard, I find it a useful addition to so many savoury recipes. At this time of year, whilst walking Algy & Poppy in the morning, I am able to gather walnuts that have fallen from the tree, 50grams of wet (or commercially available) walnuts will add a great crunch to the texture of these savoury nuggets. Whenever I think of creating something using chard, or beetroot, cumin is the spice I automatically turn to; to me the flavour of cumin marries beautifully with the earthy tones of the vegetables.


For this recipe you will need;
500g of Swiss chard (including stalks)
250g of Cheddar cheese
150g of bread crumbs (from a day or two old loaf)
50g of walnuts, wet walnuts if possible
3 eggs
3 flat cloves of garlic
1 tablespoon of olive oil
1 teaspoon of Marigold Bouillon Powder or 1/2 teaspoon of salt
1 teaspoon of cumin seeds
1/2 teaspoon of black pepper
1/2 teaspoon of chilli powder
 Oil for frying

Begin by chopping up the garlic and frying gently with the cumin seeds in the olive oil. I use a large sauteuse which will accommodate the rather bulky chopped chard, but any large pan will work. Fry the garlic until it begins to take on colour, add the chopped chard, stalks first because they take a little longer to cook. Fry gently for a minute or two before adding the leaves. Fry for a further couple of minutes, place on a lid and switch off the heat.
I use a food processor to turn the bread into breadcrumbs, roughly chop the walnuts and to grate the cheese. Having done this, place the breadcrumbs, walnuts and cheese in a large bowl. Add the seasoning and finally place the chard mixture into the processor and pulse for a moment or two just to roughly chop, you don't need to take this down to a puree consistency.
Stir into the dry ingredients and mix in the eggs. The mixture should be easy to form into balls, flatten slightly to create rissoles or burger shapes. At this point they can be kept in the fridge for up to 8 hours before frying gently in shallow oil. Fry one one side until you have a rich brown colour, then turn and fry on the other side.


Notes:
I have to say I enjoy these as much cold, in a sandwich, as I do hot.
They make an excellent vegetarian alternative to burgers and they're delicious served hot with fried mushrooms and eggs for breakfast.
I made a second, larger batch of these and mixed in some cooked mushrooms I had that were left over from another meal. I chopped the mushrooms up having fried them. I couldn't have imagined the addition of cooked mushroom would make them even more delicious, but it does; so much so I may have to include them from now on.

Sunday 21 September 2014

Marmalade Cake


This is a light cake, perfect with a cup of tea and easily digested, it has a scattering of golden sultanas and a deep flavour of bitter oranges. If like me you are thinking about the marmalade making season fast approaching on the heels of Christmas and the New Year, then this cake is a really good way of using up some of this year's marmalade in preparation. I chose to bake the mix in 2, 15 centimetre cake tins, this way you have one to enjoy and a second to give to a friend.

For this recipe you will need;
300g of Self Raising flour
300g of marmalade
275g of golden sultanas
250g of unsalted butter (room temperature)
225g of light Muscovado sugar
100g of ground almonds
4 eggs
1 teaspoon (heaped) of mixed spice
1/2 teaspoon of salt
A large thumb sized piece of fresh ginger, peeled and grated

Prepare 2 15centimetre baking tins by lining them with baking parchment. Switch the oven on to 140C.
Cream together the butter and the sugar until light and fluffy. Add the eggs one at a time. Add the salt, mixed spice and ginger and beat in the ground almonds, marmalade and golden sultanas. Finally beat in the flour, until thoroughly mixed but no more.
Divide the mix between the 2 baking tins and place in the centre of the oven and bake for 1 hour 30 minutes, or until a wooden skewer comes out cleanly when pushed into the centre of the cake. Allow the cakes to cool completely before removing from the tins.

Notes:
This cake freezes really well.
The mixed spice and ginger are not in any way dominant flavours, they simply enhance the marmalade flavour.

Tuesday 2 September 2014

Tomato Oil


With tomatoes ripening every day, I am happily in that state where it is difficult to keep up with supply. I'm not complaining, I don't buy fresh tomatoes during the year and savour this time of plenty.
Tomato oil is one way of preserving tomatoes and I find having a jar of it in the fridge, really useful. The odd spoonful gets added to all sorts of things from curries to pasta sauces to give the dish a boost.
I make my own passata, click here for the recipe but a good quality commercial passata is perfectly acceptable.


Burkina Faso, welcome! number 134.
Welcome Palestine! bringing the number up to 135.
For this recipe you will need;
500ml of passata
400ml of light flavoured olive oil
1 large head of garlic
2 red chillies
80g of jarred peppers, I use a brand called Peppadew
2 teaspoons of Pul Bebber chilli flakes
2 teaspoons of paprika
2 teaspoons of flaked sea salt

Begin by peeling and slicing in half, all the garlic cloves, cook them along with the chillies in the olive oil over the lowest heat you can manage, for 5 to 10 minutes or until the garlic cloves float to the surface and have taken on only a very little colour. Remove the garlic and chillies from the oil and place in a jug blender along with all the other ingredients. Taste the pureed mix to see if you require more chilli or if perhaps a little sugar is needed. Pour the mix back into the olive oil and place again on the lowest heat you have, place on a lid and cook gently for an hour. Whisk together the mix and pour into sterilized jars.


Notes:
I usually find this quantity keeps me going for 4 to 6 weeks and the jar keeps perfectly happily in the fridge for that length of time. It may well last longer and as long as the lid has not been removed, it may last out of the fridge but I cannot claim it does as I haven't ever tried it.
Forget putting out a bowl with olive oil and balsamic vinegar on the table for your guests to tuck into with chunks of freshly baked bread, a shallow bowl of this tomato oil makes a very welcome alternative.
The oil tends to rise to the surface and of course in the fridge it solidifies but I find whisking it for a moment or two redistributes the oil perfectly.

Thursday 28 August 2014

Ginger Toffee Pudding

Im afraid I had already started. . . . . . .  sorry!

I was making a tiramisu the other day and was reminded just how delicious the mascarpone cream mixture is. The thought occurred to me that it could and should be used far more often, simply in place of whipped cream. It was just this idea that got me thinking about what to make to serve it with and a ginger version of my sticky toffee pudding is what sprang to mind.
The puddings are best served as soon after baking as possible, so make the toffee sauce and whip the cream before starting to make the puddings themselves.

For the puddings (serves 6) you will need;
150g of stoned dates
150g of S R flour
120g of muscovado sugar
120g of unsalted butter
2 medium eggs
1 thumb size piece of ginger, grated
2 teaspoon of powdered dried ginger
1 teaspoon of bicarbonate of soda
1/4 teaspoon of salt.

For the toffee sauce you will need;
50g of muscovado sugar
50g of unsalted butter
200ml of double cream
1/2 teaspoon of sea salt flakes

For the mascarpone cream you will need
200ml of double cream
200g of mascarpone
1 teaspoon of good vanilla extract
20g of caster sugar

Make the toffee sauce by melting the butter in a small heavy based pan on a low heat, add the sugar and cook until the sugar is also completely melted, about 4 to 5 minutes on a low heat, add the cream and stir in the salt. Cook for a further 5 minutes, allowing the sauce to gently bubble and become a smooth, silky brown. This sauce can be heated back up at the point where the puddings are ready to be served.

Whisk the cream until it begins to thicken, add the mascarpone and continue to whisk until the cream forms soft peaks, finally whisk in the sugar and vanilla. Set to one side.

Begin by placing the stoned dates chopped up in a small pan with 200ml of water and bring to a simmer, simmer for 5 minutes. Remove from the heat and allow to cool.
Switch the oven on to 180C.
Grease the inside of 6 large dariol moulds, I use ones that hold 150ml. Place a small disc of parchment paper in the bottom of each mould to make removal of the puddings easier. When the simmered dates have cooled, transfer them and the water they were cooked in to a food processor. Add all remaining ingredients and process for half a minute. Divide the mixture between the 6 moulds and place in a moderate oven 180C for 17 to 20 minutes or until a bamboo skewer comes out cleanly.
Tip out the puddings onto individual serving dishes and pour on the hot toffee sauce, finally place a large dollop of the mascarpone cream on top and serve immediately.

Notes:
This pudding pretty much gives you enough calories to then go and plough the bottom 14 acres of land without feeling too hungry, if you don't have the ploughing to do, perhaps you should limit the first course of any meal where this pudding is served to something very low in calories. Either way it is a delicious combination of flavours and once in a while, a bit of a treat.

Thursday 21 August 2014

Lemon Courgette Cake


If like me you grow courgettes and as I do find the odd one that has grown to twice (or more) the size that you would have preferred, this is an excellent cake to use those courgettes up. The shredded vegetable adds just the right degree of moistness to the cake and the subtle flavour doesn't compete with the lemon.

And for the lightest version, make 16 cupcakes.
For this recipe you will need;
300g of caster sugar
300g of grated courgette (weighed after squeezing)
280g of self raising flour
250ml of vegetable oil (I use rapeseed)
4 large eggs
2 lemons
1 teaspoon of baking powder
1/2 teaspoon of salt

For the lemon syrup;
80g of icing sugar and the juice of both lemons.

Begin by finely grating the courgette and remove as much liquid out of them as you can by placing them in a clean tea towel and squeezing.
Prepare 2 x 23 centimetre cake tins by lining the tins with baking parchment. Leave the sides unlined and un-greased. Switch the oven on to 180C.
Place the sugar and the thinly pared rind of the lemons in a food processor and process until the rind is fine and has pretty much disappeared into the sugar. I find this method is best for extracting the most flavour from any citrus peel. In a large bowl, combine the flour, flavoured sugar salt and baking powder and stir to mix thoroughly. Add the grated courgette. Whisk together the eggs and the oil and add to the bowl. Working quickly, mix all the ingredients to form an even mix. Divide between the 2 cake tins and place in the hot oven to cook for 35 minutes. A bamboo skewer should come out cleanly when pushed into the center of the cake when fully cooked. While the cakes are baking bring the lemon juice and icing sugar up to a boil and cook for no more than a minute to dissolve the sugar. Before the cakes cool completely, make about 40 little holes all over the surface of each cake using a bamboo skewer, divide the lemon syrup between the 2 cakes, ladling it on with a tablespoon, you should have about 3 tablespoons per cake.
Allow to cool on a cooling rack before turning out. Sandwich together with either whipped cream if you plan on serving all of the cake on the same day, or like me a cream cheese frosting if you plan to serve the cake over a period of 2 or 3 days.

Notes:
Apart from the fact that I don't like discarding anything when I can find a use for it, using the juice of the lemons having already used the rind to flavour the cakes, gives this cake a really fresh lemon flavour.
If you wanted to use orange in place of lemons, use 1 large orange and fill the cake with a chocolate ganache.

Thursday 14 August 2014

Aubergine and Roasted tomato Pasta Sauce


My friend Sylvia grows wonderful aubergines, no easy task for a plant that requires such a long period of growth in the sun. My aubergines will certainly not be ready for another week or two. She kindly gave me a couple the other day and I decided to create a pasta sauce using one of them. The tomatoes from the greenhouse are coming thick and fast so combining the aubergine with some of these and the addition of the obligatory garlic seemed a good idea. People who read my blog know that I rarely use currants, but adding currants to this sauce brought out the slight tannin flavour of the aubergine skin producing a rich deep flavoured sauce.

For this recipe (enough to feed 4) you will need,

700g of fresh tomatoes
1 large aubergine
50g of currants
4 cloves of garlic, chopped
3 tablespoons of olive oil
1 tablespoon of tomato puree
2 anchovy fillets (optional)
1 teaspoon of salt
1/2 teaspoon of coarse ground black pepper
1/2 teaspoon of cayenne pepper.

Begin by dicing the aubergine and frying in 2 tablespoons of olive oil along with 1/2 teaspoon of salt in a large heavy based pan. Fry on a medium heat and stir from time to time to ensure each surface gets a reasonable chance to colour up. Meanwhile cut the tomatoes into chunks and place with the remaining salt and oil in a hot oven to roast. Roast them for 15 to 20 minutes at 200C or until they have released their liquid and the skins have taken on a little colour.
When the diced aubergine has turned a little brown, add the chopped garlic and the anchovy fillets if using. Cook for a couple of minutes before adding the tomato puree. Cook for a further couple of minutes, stirring to make sure all the ingredients get exposed to the heat of the pan. Finally add the roasted tomatoes, currants, pepper and cayenne and 200ml of water. Cover with a lid and cook on a low heat for 10 minutes while you cook whatever pasta you fancy.


Notes;
Frying the aubergine, which so readily soaks up oil, in so little oil is made possible by the addition of salt. The salt will draw liquid out of the aubergine and force the oil back out of the vegetable.
I find the use of anchovy fillets really adds a depth of flavour to the finished sauce, leave them out of course if you are feeding vegetarians, the rest of the dish may well be vegetable based but people who regard themselves as vegetarian quite rightly include fish, even tiny ones.
The currants provide a fruity sweetness which doesn't in any way over-sweeten the dish but does enhance the flavour of the tomatoes and balances the tannins in the aubergine and the currants themselves.

Monday 21 July 2014

Pesto


The basil in the greenhouse is beginning to flower so it's time I made pesto. This easy recipe produces a jar of highly scented and delicious pesto which will keep in the fridge for a couple of weeks (as if you're ever going to leave it that long!). I find the addition of a little citric acid helps to keep the fresh green colour and avoid oxidation.

Welcome British Indian Ocean Territory, number 132!
Welcome Iraq, bringing the total up to 133!


For this recipe you will need;
100g of fresh basil leaves
100g of pinenuts
150g of freshly grated parmesan cheese
3 fat cloves of garlic
100ml of a light olive oil
1/2 teaspoon of salt
1/2 teaspoon of citric acid, available online or from wine making suppliers

Begin by picking over your basil leaves, this just means picking the leaves off the stalks and discarding any that look damaged in any way. When using Greek basil I usually leave the tiny leaves on the finer stalks. I find using a food processor makes really light work of pesto making. Place the parmesan cheese, cubed into the processor and process until you have a fine breadcrumb consistency. Add the pinenuts and process again, add the garlic and again process until all appears evenly fine. Finally process the basil leaves and pour in the light olive oil until you have the creamy consistency you like. Adjust the seasoning, adding salt and if you're using it, the citric acid. Place in a lidded jar and keep in the fridge.


Notes:
I like to use a heaped tablespoon of this pesto along with 500g of oven roasted tomatoes as a sauce for pasta, the freshness of the tomatoes, in my opinion enhances the rich herb and cheese flavour of the pesto.

Almond Croissant


Considering how fond I am of almond croissant it was only this last weekend that I made them for the first time. Simply make the basic croissant dough and a batch of frangipan and an almond croissant can be yours for breakfast anytime you choose.

For this recipe you will need;
1 portion of basic croissant dough click here for the recipe
1 portion of frangipan made from;
100g of ground almonds
40g of unsalted butter
60g of caster sugar
1 medium egg
a pinch of salt

Topping consists of a little fondant icing and a few flaked almonds that have been toasted.

Make the frangipan by creaming together the butter and the sugar, add the egg and the salt and beat in before mixing in the ground almonds. Place the mix in a piping bag fitted with 1 centimeter nozzle and place in the fridge.
Prepare the croissant dough and at the point where you have cut out 8 to 12 triangles, pipe an amount of the frangipan along each of the base edges before proceeding with rolling up the croissant. Don't worry if some of the frangipan is exposed it should just cook along with the rest of the croissant without oozing out.
leave to rise fully, this can take several hours, I usually leave them overnight, before baking in a hot oven, 200C for 17 to 20 minutes. Drizzle with a little fondant icing made from fondant icing sugar and water, and finally scatter with some toasted flaked almonds.


Notes:
I have never come across an almond croissant which wasn't flattened, I don't know why but consistently they are far flatter than standard croissants. With this in mind I half expected some sort of deflating to go on once they were out of the oven and cooling on a wire rack, however, they remained perfectly inflated, so almond croissant that look like they have been sat on remain a mystery.

You may find that you have a little frangipan left over, simply form into little balls and bake on a tray while the croissant are baking, they make perfect little petit four to serve with a cup of cafe ristretto.

White Chocolate & Peanut Butter Blondies


I put together this recipe just over a week ago, and after trying the result realised that I needed to reduce the sugar content even more. White chocolate is so much sweeter than the 70% dark chocolate I use in my brownies. Somehow the batch seemed to disappear without too much trouble, but yesterday I made a second batch and so now I am sharing my revised recipe with you.

I need chocolate!

For this recipe you will need;
250g of white chocolate
175g of unsalted butter
350g of caster sugar
100g of crunchy peanut butter
150g of Self Raising flour
4 eggs
1/2 teaspoon of salt
140g of salted peanuts

As with my brownie recipe click here for the recipe, prepare a baking tin and switch on the oven. Melt the chocolate, butter and peanut butter in a pan over a pot of water that is barely simmering. White chocolate is trickier to melt but the addition of butter and peanut butter makes it unlikely that you will get into difficulty. When the ingredients are melted, allow to cool for 5 minutes before whisking really well to produce an even glossy consistency. Whisk in the sugar, then the 4 eggs. Whisk in the flour, salt and finally stir in the salted peanuts. Pour the whole into the prepared baking tin and bake for 35 to 40 minutes. A bamboo skewer should come out with still a little of the mix adhering to it, in order for the centre to be gooey.

Altering the original

Notes:
I find this mixture requires a little longer to cook, but keep an eye on them.

Wednesday 9 July 2014

Chocolate Brownies


My daughter makes the best brownies I know, well that at least is what I have always thought and I get her to make a batch occasionally when she visits.This means that in the last nine years I have not made brownies, so you can imagine my surprise when I telephoned her to ask her for the recipe, "But it's your recipe" she said. I had completely forgotten that when she set off to university I equipped her with some of what I considered essential recipes, brownies being one of them.

She sent me the recipe via text, very modern, and I have tweaked it so that she and I will continue to make different brownies to each other.

For this recipe you will need;
250g of chocolate (70%)
250g of unsalted butter
400g of caster sugar
4 medium eggs
140g of S.R.flour
120g of walnuts pieces
100g of white chocolate chips
100g of dried sour cherries
50ml of seriously strong fresh espresso coffee
1/4 teaspoon of salt

Begin by placing the butter and chocolate (not the white chocolate chips) in a large bowl over a small amount of simmering water. Switch off the heat and leave for 10 minutes until the chocolate is completely melted while you line a baking tin with baking parchment; I use one that measure 30cm by 20cm by 5cm.
Set the oven to 180C
When the chocolate butter mix is fully melted allow it to cool for 10 minutes before stirring in the sugar and mixing thoroughly, beat in the eggs and coffee. It's important at this point to keep mixing until you have a smooth even consistency. Stir in the flour and salt and again beat to achieve a smooth consistency before you finally add in the nuts, cherries and white chocolate chips. Pour into the prepared baking tin and bake for 30 to 35 minutes. Test the brownies at 30 minutes by pushing a toothpick or wooden skewer into the centre, unlike the test for when a cake is cooked the stick should come out slightly glistening with the mix. You need to judge just how wet the stick can be and this will only happen with experience, too wet, i.e. too much mix on the stick and the centre will be seriously wet when the brownies have cooled, no real hardship, what you need to avoid is the stick coming out completely dry, this will mean your brownies will taste delicious but not have the yielding texture that they should. Divide and cut the brownies while still a little warm.


Notes:
Clearly you can bring your own variation to this recipe, you can vary the nuts and dried fruit, but essentially this is a good recipe for a basic brownie, producing 18 brownies in all.

Saturday 5 July 2014

Peach Leaf Pannacotta


It was about 20 years ago that I first made peach leaf ice cream, amazed to discover that these simple long mid green leaves render up a bitter almond flavour, not unlike that of a good amaretto biscuit. The other day I thought the same technique of steeping peach leaves in scalded milk would work as a flavour for pannacotta. Now I far prefer making pannacotta with a mix of milk and double cream, I think it produces a lighter end product with a delicate texture, especially if you disregard the instruction on the packets of gelatin or vegetarian gelling agent and put in 75% of the recommended amount, in this case 3 rather than the recommended 4 sheets of gelatin. I also think it's far easier to pour the pannacotta into small serving bowls so that you can top them with whatever you wish thus avoiding the task of unmoulding them. 


Happy to welcome Martinique, bringing the number up to 131
For this recipe you will need;

300ml of double cream
300ml of full fat milk
7 peach leaves
3 gelatin leaves (4 being recommended to set 600ml)
30gm of sugar
A pinch of salt

Bring the milk to just under the boil in a small saucepan and place in the washed peach leaves, I have my own peach tree so I know the leaves have not been sprayed with any insecticide but do check. Allow the leaves to steep in the hot milk for 10 minutes, you may need to experiment with the timing but I find 10 minutes produces a subtle flavour avoiding too much bitterness. I add the sugar and salt at this point and taste to see what I think. Sweetening the mix allows you a more accurate sense of whether or not you need to put the leaves back in for a few minutes more. Bring the milk back up to scalding, just under a boil, and add the gelatin leaves (or vegetarian gelling agent) having soaked the leaves in cold water for a couple of minutes. Stir to ensure the gelatin completely dissolves, add the cream, stir well and share between 4 dessert bowls, leaving enough room to place a small amount of topping on each just prior to serving.


Notes:
I served these with a compote of rhubarb and raspberry. My early strawberries have finished and my late ones have yet to fruit. My rhubarb is still going strong and since I have it in a flower bed I like how the leaves look but thinning out three stalks was sufficient to make a small mount of topping with 200gm of raspberries, the last of the early variety grown here. I stew the rhubarb with a little sugar for a few minutes until softened then pour in the raspberries but don't stir them until the rhubarb has cooled completely, This way the raspberries remain reasonably intact when served.